Text Tool

This tool allows you to add text to your artwork.
You use it by doing  + drag to create a rectangular selection. When releasing a default text will be created and the text editor window will pop-up.
Hovering over other text shapes will highlight their bounding box. on a highlighted text will select it as the active text.
Tool Options
This contains features with which to create new texts, the following items are available:
The letter type used by newly created texts.
The letter-size used by newly created texts. It is in pts (points), which is a common standard for fonts that is measured 72 points per inch. It therefore will stay proportionally the same size if you increase or decrease canvas dpi.
Anchor/Align text to the left/middle/right
Text alignment. This allows you to align text to the left, center it, or to the right. This is called text-anchor because SVG 1.1’s multiline text only uses text-anchor, and this is a slight bit different than text-align (and also the reason justify isn’t available at the moment).
The letter spacing used by newly created texts.
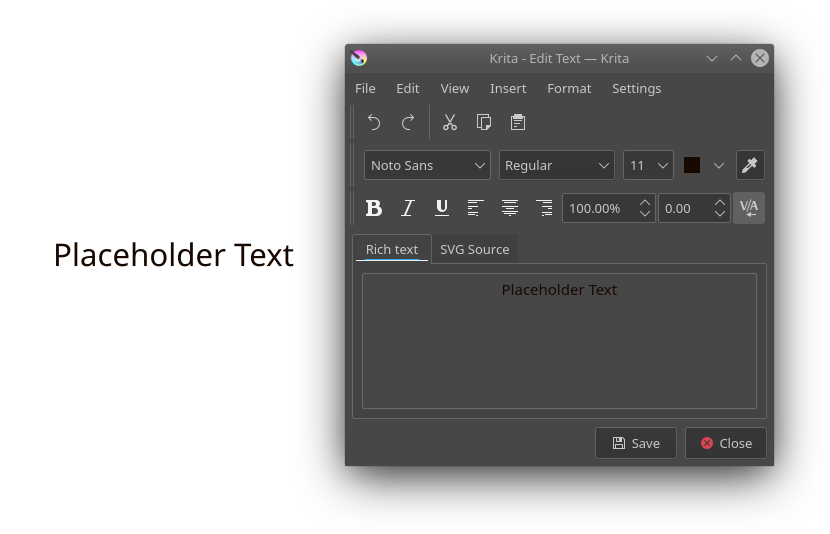
Éditeur de texte
A small window for all your text editing needs. The Text Editor has two tabs: Rich text and SVG source.
 Activation
You can use the Text tool to first create a text box. There are a few options in the tool options if you want to customize how the text will be adding. You will need to drag a rectangle on the canvas to create the text area. Once your text is created, you can edit the text from two ways:
Select the text with the shape selection tool (first tool). Press the Enter key. The text editor will appear.
Select the text with the shape selection tool (first tool). Then click the Text tool. In the tool options there is an Edit Text button. When you click that the text editor window will appear.
If you are unfamiliar with the way SVG text works, use the rich text tab, it will allow you to edit the text as you see it, at the cost of not having all functionality.
If you are a little bit more familiar with SVG text, you can directly edit the SVG source. Do note that not all attributes and properties are converted back to the rich text editor, so do be careful when switching back.
Press Save as you’re done with your edits to preview them on canvas.
Fichier Save Ctrl + S
Save current edits to the text on canvas.
Basic editing functions:
Undo the last action in the text editor.
Redo Ctrl + Shift + Z
Redo the last undone action in the text editor.
Cut selected text to the clipboard.
Copy selected text to the clipboard.
Paste text from the clipboard.
Select all Ctrl + A
Select all text in the active editor.
Deselect Ctrl + Shift + A
Deselect any selected text.
Pops up a window with an input to find the given text in the active editor.
Searches for the next text using the last search key.
Find Previous Shift + F3
Searches for the last text using the last search key.
Pops up a dialog with two inputs: The string you wish to find, and the string you wish to replace it with. Will always replace ALL found instances.
Insérer Special Character. Alt + Shift + C
Pops up a dialog that allows you to search for special characters that are difficult to type in with your keyboard.
Format Bold Ctrl + B
Set the font-weight to bold.
Sets the selected text italic.
Underline the selected text.
Adds a strike-through text decoration.
Superscript Ctrl + Shift + P
Sets the text to super-script baseline.
Subscript Ctrl + Shift + B
Sets the text to subscript baseline.
Sets the font weight a little more specifically. Possibilities are. Light, Normal, Bold, and Black.
Align the selected paragraph to the left.
Align Center Ctrl + Alt + C
Center the selected paragraph.
Align Right Ctrl + Alt + R
Align the selected paragraph to the right.
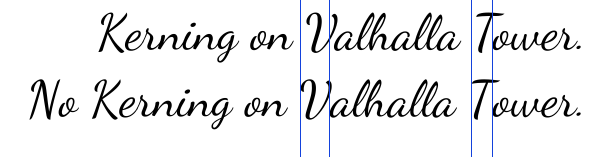
Toggles kerning for selected text.
Calls up the text-editor settings dialog.
Text Editor Settings
The settings that can be configured for the text editor.
Whether you want both the Rich Text Editor and the SVG Source Editor, or only one of either.
Here you can configure the syntax highlighting for the SVG source.
The format for highlighting the element tag name. text and tspan are examples of element names.
The format for highlighting value of attributes.
The main color of the editor.
Editor background color
The main background color of the editor.
This allows you to filter the selection of fonts in the editor by writing system. Some systems have a lot of fonts specifically for showing foreign languages properly, but these might not be useful for you. You just tick the writing systems which you use yourself, and the font drop-down will only show fonts that have full support for that language.
Fine typographic control with the SVG Source tab
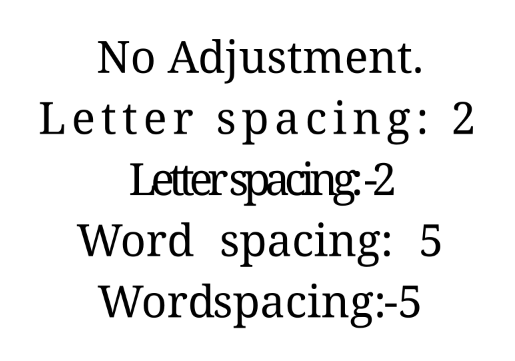
Word-spacing, Letter-spacing and Kerning
These three are written and read from the rich text tab, but only two of them can be controlled from Rich Text tab.

This is the distance between letters in pts, usually. Just write letter-spacing in the style and add a distance in pts behind it. A negative value will decrease the value between letters.
This is the extra distance between words, defaulting to pts. By default, word-spacing: 0; will have it use only the width of the space character for that font. A negative value will decrease the amount of space between words:
x, y, dx, dy
These are even finer-grained controls that can be used to position text. However, they CANNOT be reliably converted to the format of the rich text editor, because the rich text editor uses these to figure out if a line is a new-line and thus writes to these.
X and Y are absolute coordinates. But because you cannot change the absolute coordinates of the text from the editor, these get added to the position when they show up in a tspan.
These are relative coordinates to the position of the previous letter.
Font-stretch and Small-caps
These can also be stored and written to the rich text tab’s internal format, but they don’t get used in the on screen text object.
Dominant Baseline, Alignment baseline, Font-size-adjust, Writing mode, Glyph-orientation, rotate
These are not stored in the rich text right now, and while they can be written into the SVG text, the SVG text-shape doesn’t do anything with them.
Krita generates font-size-adjust for the font when coming from rich text, as this can help designers when they want to use the SVG source as a basis for later adjustments.
© Copyright licensed under the GNU Free Documentation License 1.3+ unless stated otherwise. Build 1477.
Text Tool

This tool allows you to add text to your artwork.
You use it by doing  + drag to create a rectangular selection. When releasing a default text will be created and the text editor window will pop-up.
Hovering over other text shapes will highlight their bounding box. on a highlighted text will select it as the active text.
Tool Options
This contains features with which to create new texts, the following items are available:
The letter type used by newly created texts.
The letter-size used by newly created texts. It is in pts (points), which is a common standard for fonts that is measured 72 points per inch. It therefore will stay proportionally the same size if you increase or decrease canvas dpi.
Anchor/Align text to the left/middle/right
Text alignment. This allows you to align text to the left, center it, or to the right. This is called text-anchor because SVG 1.1’s multiline text only uses text-anchor, and this is a slight bit different than text-align (and also the reason justify isn’t available at the moment).
The letter spacing used by newly created texts.
Text Editor
A small window for all your text editing needs. The Text Editor has two tabs: Rich text and SVG source.
 Activating
You can use the Text tool to first create a text box. There are a few options in the tool options if you want to customize how the text will be adding. You will need to drag a rectangle on the canvas to create the text area. Once your text is created, you can edit the text from two ways:
Select the text with the shape selection tool (first tool). Press the Enter key. The text editor will appear.
Select the text with the shape selection tool (first tool). Then click the Text tool. In the tool options there is an Edit Text button. When you click that the text editor window will appear.
If you are unfamiliar with the way SVG text works, use the rich text tab, it will allow you to edit the text as you see it, at the cost of not having all functionality.
If you are a little bit more familiar with SVG text, you can directly edit the SVG source. Do note that not all attributes and properties are converted back to the rich text editor, so do be careful when switching back.
Press Save as you’re done with your edits to preview them on canvas.
Save current edits to the text on canvas.
Basic editing functions:
Undo the last action in the text editor.
Redo Ctrl + Shift + Z
Redo the last undone action in the text editor.
Cut selected text to the clipboard.
Copy selected text to the clipboard.
Paste text from the clipboard.
Select all Ctrl + A
Select all text in the active editor.
Deselect Ctrl + Shift + A
Deselect any selected text.
Pops up a window with an input to find the given text in the active editor.
Searches for the next text using the last search key.
Find Previous Shift + F3
Searches for the last text using the last search key.
Pops up a dialog with two inputs: The string you wish to find, and the string you wish to replace it with. Will always replace ALL found instances.
Insert Special Character… Alt + Shift + C
Pops up a dialog that allows you to search for special characters that are difficult to type in with your keyboard.
Format Bold Ctrl + B
Set the font-weight to bold.
Sets the selected text italic.
Underline the selected text.
Adds a strike-through text decoration.
Superscript Ctrl + Shift + P
Sets the text to super-script baseline.
Subscript Ctrl + Shift + B
Sets the text to subscript baseline.
Sets the font weight a little more specifically. Possibilities are… Light, Normal, Bold, and Black.
Align the selected paragraph to the left.
Align Center Ctrl + Alt + C
Center the selected paragraph.
Align Right Ctrl + Alt + R
Align the selected paragraph to the right.
Toggles kerning for selected text.
Calls up the text-editor settings dialog.
Text Editor Settings
The settings that can be configured for the text editor.
Whether you want both the Rich Text Editor and the SVG Source Editor, or only one of either.
Here you can configure the syntax highlighting for the SVG source.
The format for highlighting the element tag name. text and tspan are examples of element names.
The format for highlighting value of attributes.
The main color of the editor.
Editor background color
The main background color of the editor.
This allows you to filter the selection of fonts in the editor by writing system. Some systems have a lot of fonts specifically for showing foreign languages properly, but these might not be useful for you. You just tick the writing systems which you use yourself, and the font drop-down will only show fonts that have full support for that language.
Fine typographic control with the SVG Source tab
Word-spacing, Letter-spacing and Kerning
These three are written and read from the rich text tab, but only two of them can be controlled from Rich Text tab.
This is the distance between letters in pts, usually. Just write letter-spacing in the style and add a distance in pts behind it. A negative value will decrease the value between letters.
This is the extra distance between words, defaulting to pts. By default, word-spacing: 0; will have it use only the width of the space character for that font. A negative value will decrease the amount of space between words:

x, y, dx, dy
These are even finer-grained controls that can be used to position text. However, they CANNOT be reliably converted to the format of the rich text editor, because the rich text editor uses these to figure out if a line is a new-line and thus writes to these.
X and Y are absolute coordinates. But because you cannot change the absolute coordinates of the text from the editor, these get added to the position when they show up in a tspan.
These are relative coordinates to the position of the previous letter.
Font-stretch and Small-caps
These can also be stored and written to the rich text tab’s internal format, but they don’t get used in the on screen text object.
Dominant Baseline, Alignment baseline, Font-size-adjust, Writing mode, Glyph-orientation, rotate
These are not stored in the rich text right now, and while they can be written into the SVG text, the SVG text-shape doesn’t do anything with them.
Krita generates font-size-adjust for the font when coming from rich text, as this can help designers when they want to use the SVG source as a basis for later adjustments.
© Copyright licensed under the GNU Free Documentation License 1.3+ unless stated otherwise. Build 1477.
Приложение для рисования Krita. Все о программе

Понятие «художник» давно вышло за рамки обычного хобби или образа человека, перепачканного красками. В современных реалиях художники и иллюстраторы работают в графических редакторах, количество и качество функционала которых постоянно растет. Одним из таких инструментов для творчества является графический редактор- Krita.
Что это такое?
В 2015 году в рамках удачной программе на Kickstarter удалось собрать достаточно средств для выпуска улучшенной версии 3.0, что существенно повысило производительность инструментов, реализовалось больше возможностей,а также обеспечить распараллеливание операций вычислений для работы фильтров.
 Новые обновления выходят до сих пор, а большое комьюнити пользователей выпускает новые кисти,фильтры и другие утилиты чуть ли не каждый день. Главная особенность редактора- направленность на художников, то есть предполагается, что вы будете делать изображение с нуля, а не загружать и редактировать готовое.
Интерфейс
На 2019 год последней версией является 4.2.5.
Русский язык в прошивке есть, а интерфейс очень похож на Adobe.
Тем, кто раньше работал с фотошопом или программой Gimp, все будет более чем ясно, а для новичков много сложностей не возникнет, интерфейс интуитивно понятный.
Кисти по дефолту расположены в списке сверху, а выбранные вами отображаются снизу справа. Активация слоев находится под colour selector. Перед началом работы выходит окно, где можно задать параметры для будущей картины.
Рабочие области приложения для рисования
Как настроить?
 Программа поддерживает все популярные операционные системы:
И способна вычислить восемь форматов, а создавать и сохранять в шести.
Как пользоваться для начинающих и начать рисовать?
Скорее всего мышкой вам рисовать будет неудобно, ведь большинство художников пользуются для рисования специальный графический планшет, который позволяет учитывать не только направление движения, но и силу нажатия.
С чего нужно начать:
Горячие клавиши

Системные требования

Несомненными преимуществами Krita- это ее кроссплатформеность и бесплатное распространение. Данные факторы очень важны для начинающих художников, которым необходимо прокачивать навыки, а средств купить лицензионное программное обеспечение нет. Постоянные обновления избавляет от багов, а пользователи вносят свои предложения и коррективы, что положительно влияет на популярность и качество программы.
Полезное видео
Предлагаем вам посмотреть видео о программе и работе с ней:
Как пользоваться Krita
Установка Krita
Перед тем как перейти к использованию Krita, необходимо установить этот графический редактор. Это очень популярная программа и не только среди художников, поэтому вы можете получить ее очень просто. В Ubuntu программу можно установить из официальных репозиториев:
sudo apt install krita
В Red Hat и CentOS команда будет немного отличаться, но сути это не меняет:
sudo yum install krita
Если вы хотите установить Krita в Windows, а это тоже возможно, то вам нужно скачать файл установщика из официального сайта. Пока мы не подошли к подробностям, вы можете посмотреть видео с обзором возможностей Krita от одного из разработчиков:
Как пользоваться Krita?
Сразу нужно заметить, что рисовать мышью вам будет не совсем удобно, так как большинство художников используют для рисования специальный графический планшет, который позволяет учитывать не только направление движения, но и силу нажатия. Дальше мы рассмотрим как пользоваться Krita.
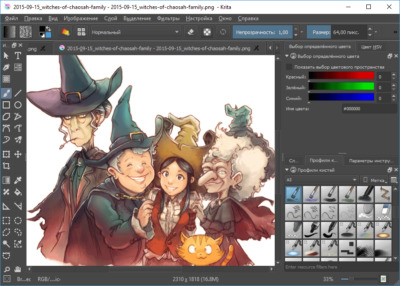
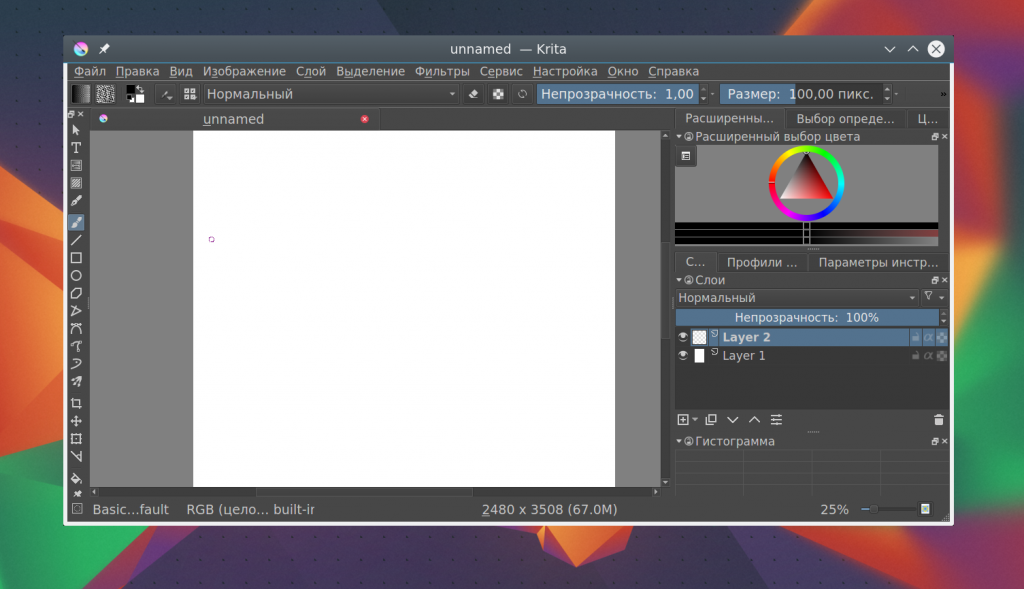
1. Интерфейс
Программа написана на Qt, но ее интерфейс выглядит нетипичным для таких приложений. Окно программы темное и чем-то напоминает Photoshop:
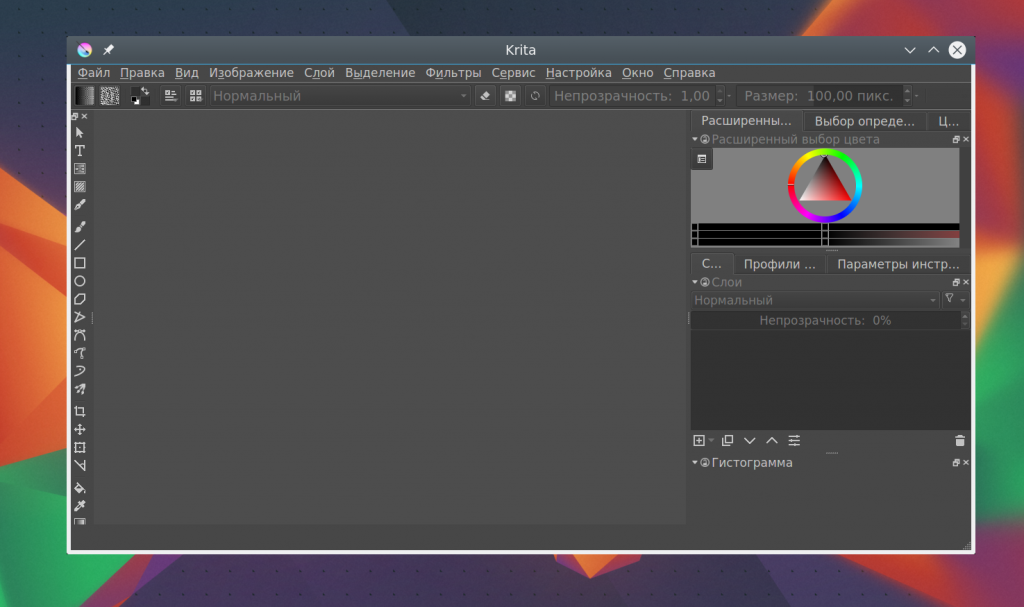
Для простоты работы давайте разделим окно на несколько областей и разберем зачем нужна каждая из них:
Дальше рассмотрим как создать свое первое изображение.
2. Создание холста
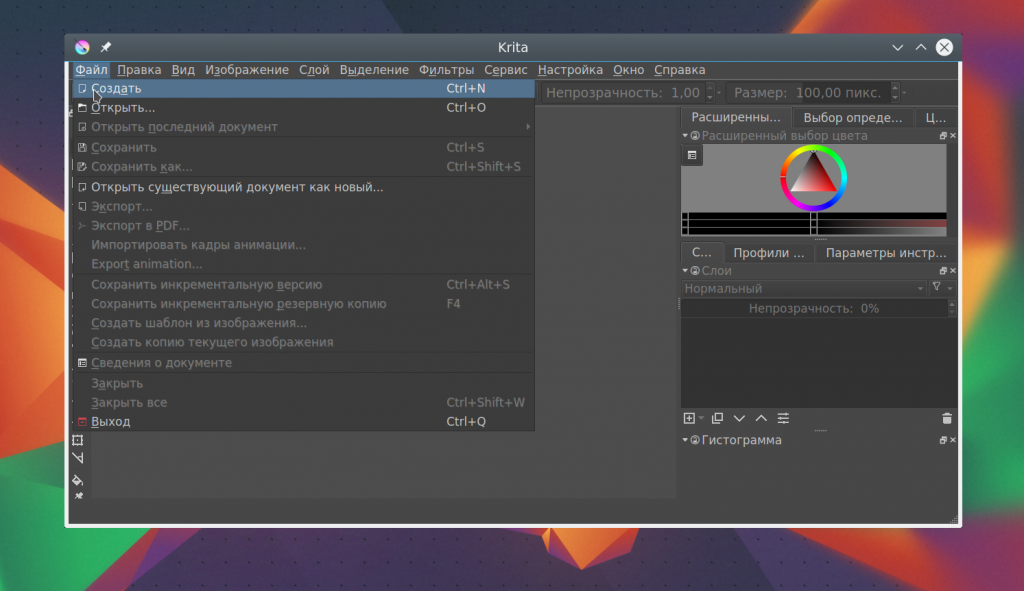
Вы не можете приступить к рисованию сразу после запуска программы. Сначала вам нужно создать холст нужного размера с нужным заполнением. Для этого откройте меню «Файл» и выберите пункт «Создать»:
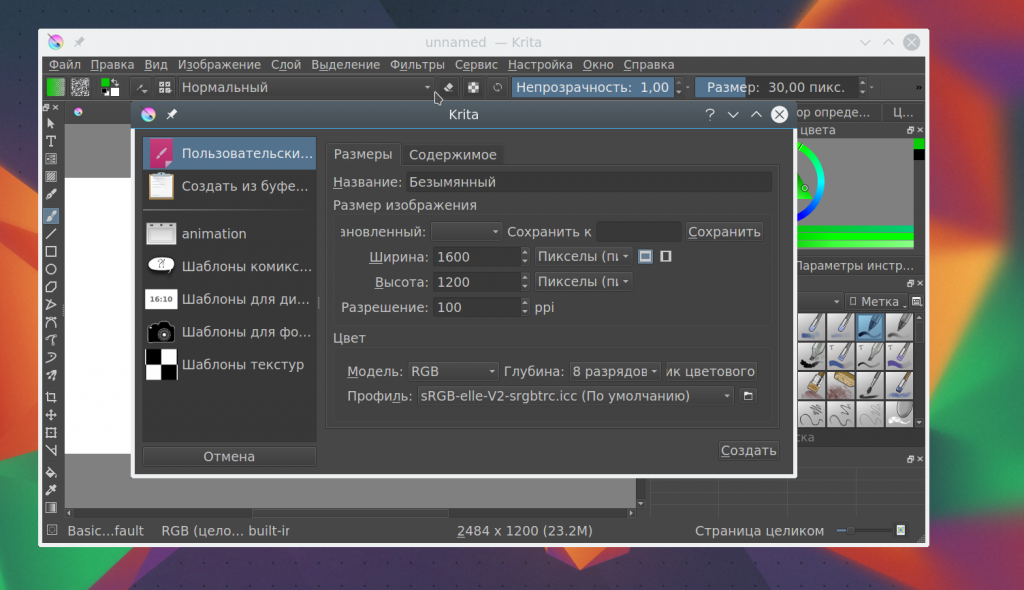
В открывшемся окне необходимо выбрать один из шаблонов или указать ширину, высоту и цвет фона вручную:
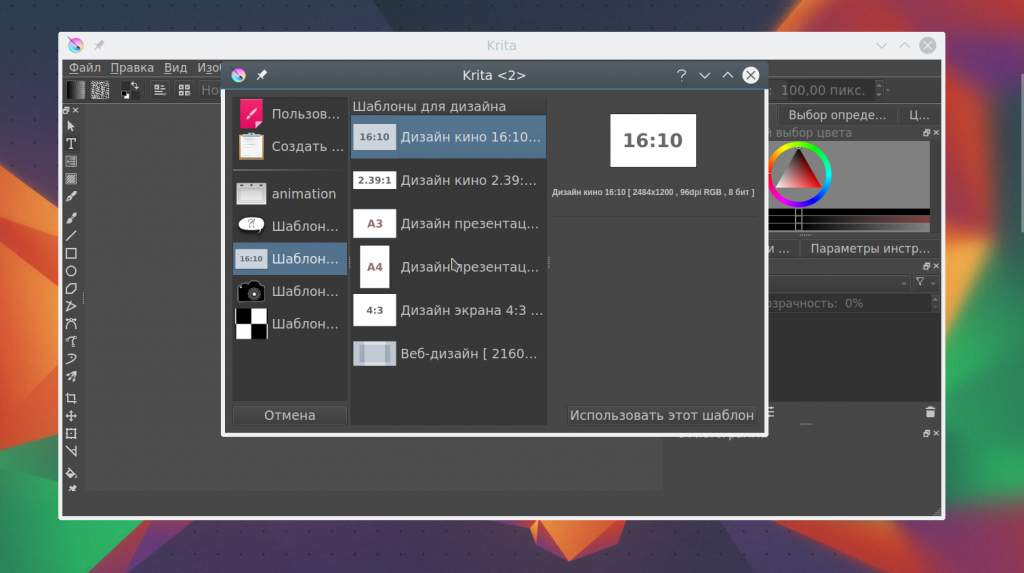
 Также можно выбирать прозрачные текстуры для рисования:
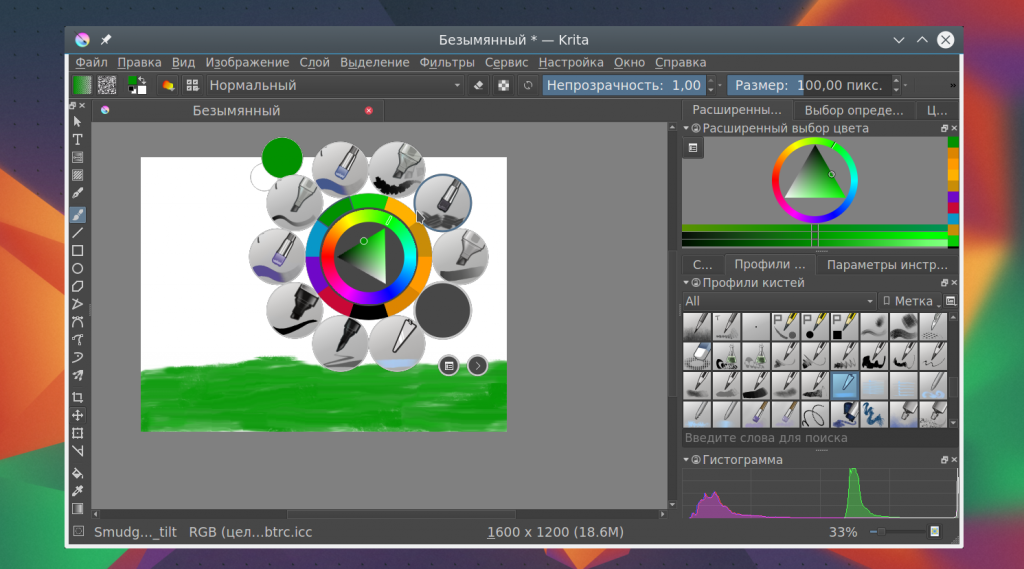
3. Использование кистей
Но нарисованы они могут быть по-разному. Кисти, которыми будет выполняться рисование можно выбрать на панели справа. Вы можете выбрать обычное рисование линии, закругление, различные штрихи и улучшения, точки, размытие и даже эффект огня. Поэкспериментируйте с кистями. Здесь есть очень много чего интересного:
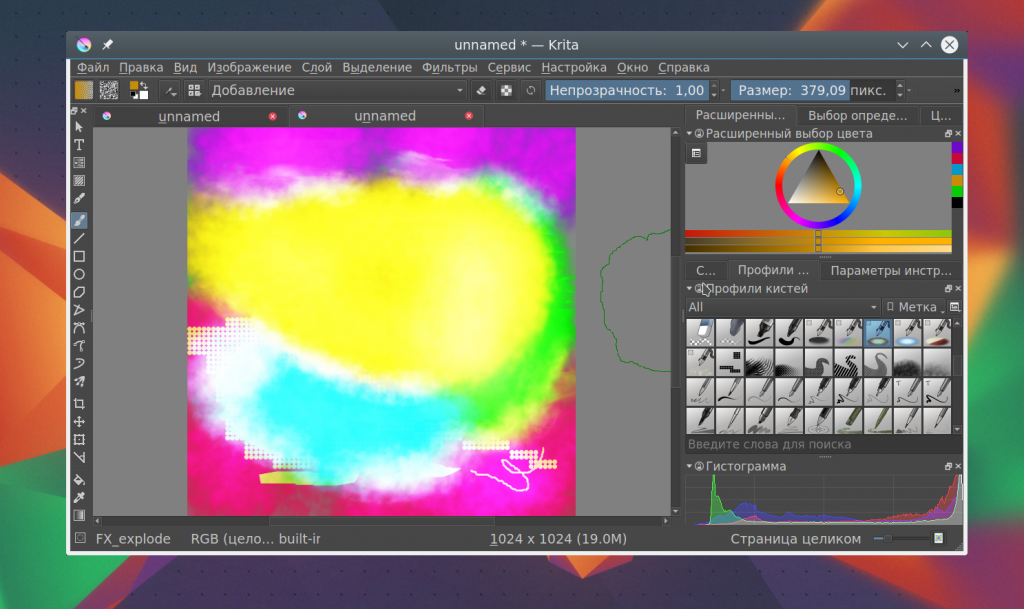
Здесь же можно подобрать цвет. Наиболее часто используемые кисти можно выбрать на колесике, которое появляется при нажатии правой кнопки мыши:
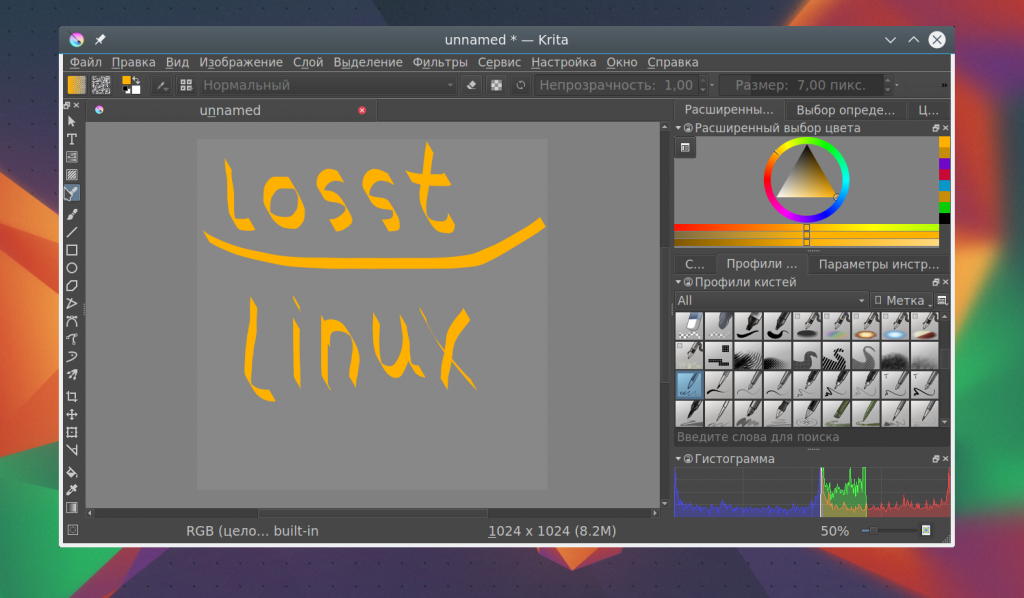
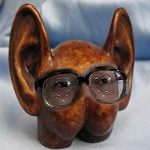
Размер кисти можно выбрать на панели инструментов над рабочей областью. Здесь же можно выбрать непрозрачность при рисовании. Экспериментируйте с различными кистями и их размерами и комбинацией. Вы можете сделать все что захотите. Я нарисовал такую простенькую картинку за несколько минут:
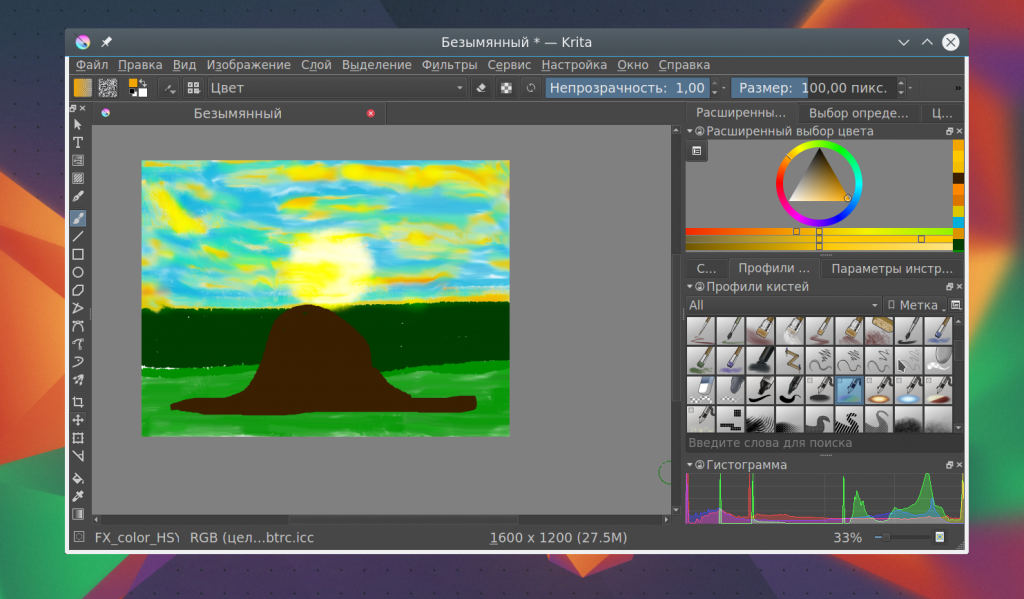
Что это? Шляпа? Нет, это удав, который съел слона ?
4. Слои
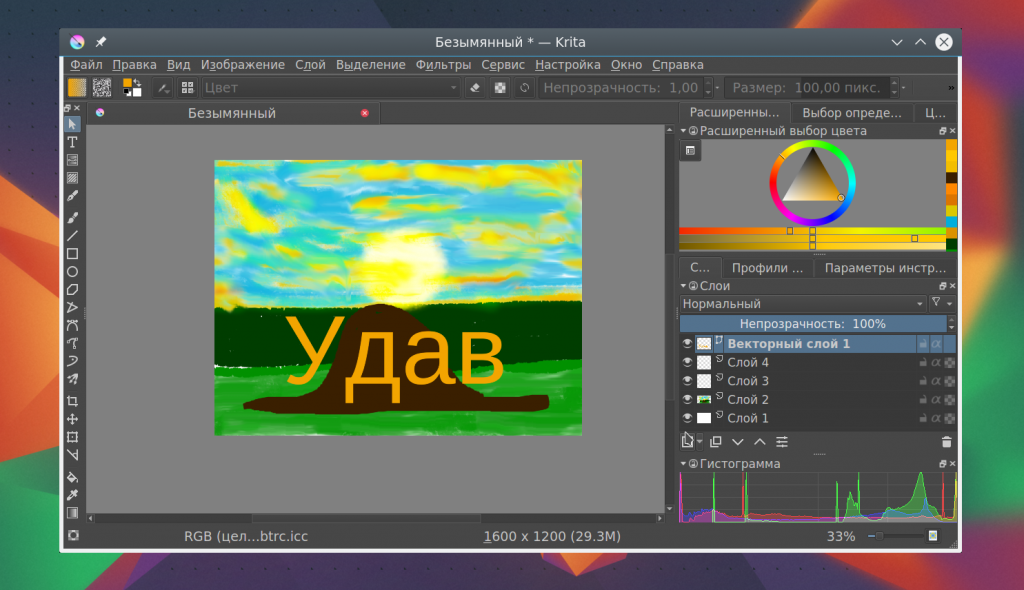
Управлять доступными слоями вы можете на панели справа. Только здесь нужно переключиться на вкладку слои. После выбора активного слоя все действия будут выполняться только на нем. Например, если мы добавим надпись, она отобразится уже на новом слое.
5. Фильтры Krita
В плане фильтров программа для рисования krita тоже не уступает Gimp. С помощью меню «Фильтры» вы можете выбрать один из поддерживаемых фильтров для улучшения вашего рисунка. Например, можно выбрать различные художественные фильтры для подражания работе кистью и красками:
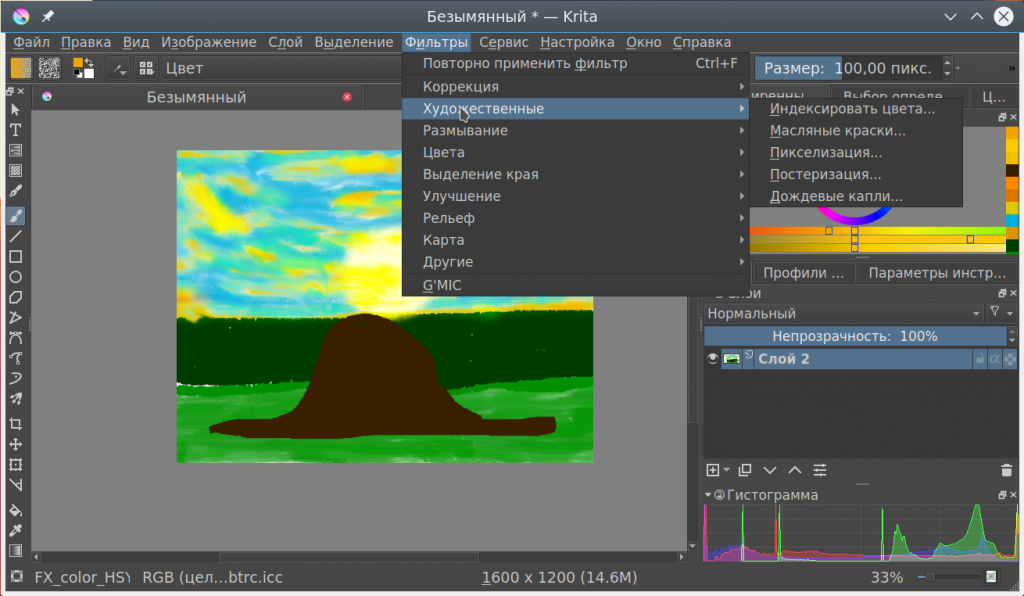
Или использовать фильтры размытия и коррекции цветов.
6. Сохранение результата
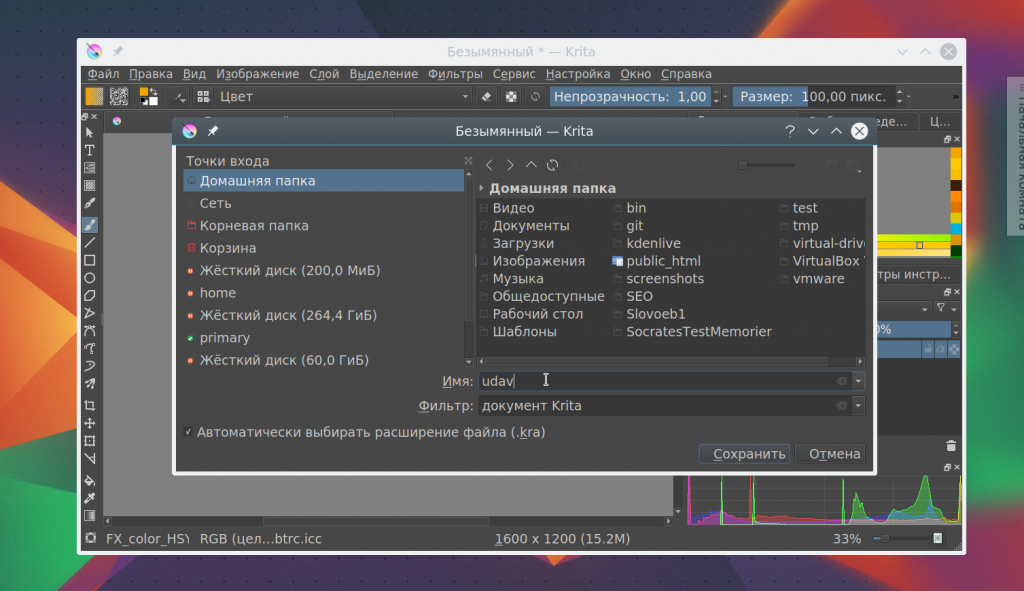
Последнее, что нужно сделать после работы в программе, это сохранить то, что у вас получилось. По умолчанию программа сохраняет результат работы в формате *.kra:
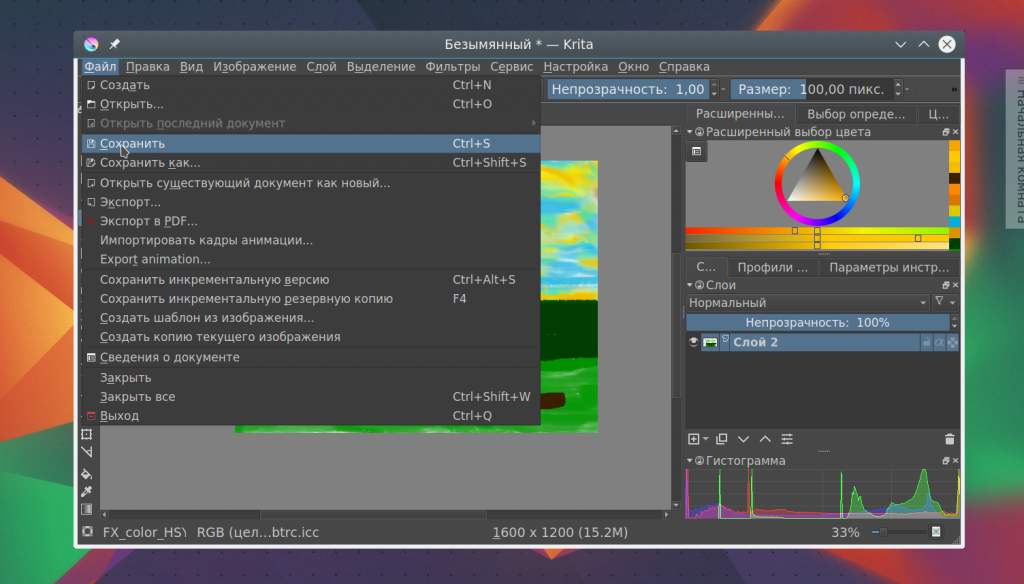
Необходимо открыть меню «Файл» и выбрать «Сохранить». Затем выберите папку для сохранения:
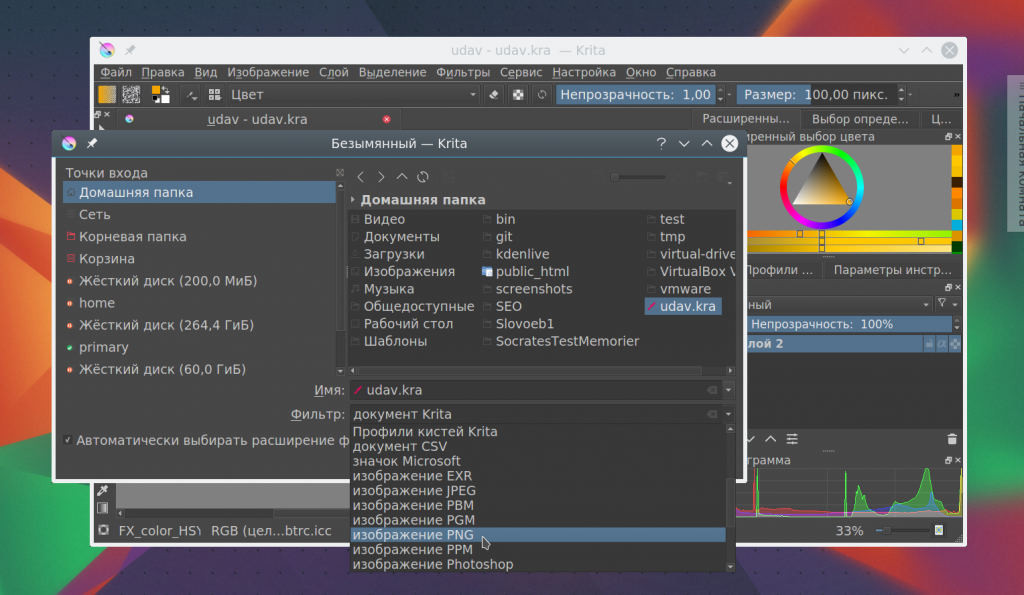
В окне выбора папки вы можете также изменить формат, на более привычный для других программ, такой как jpeg или png:
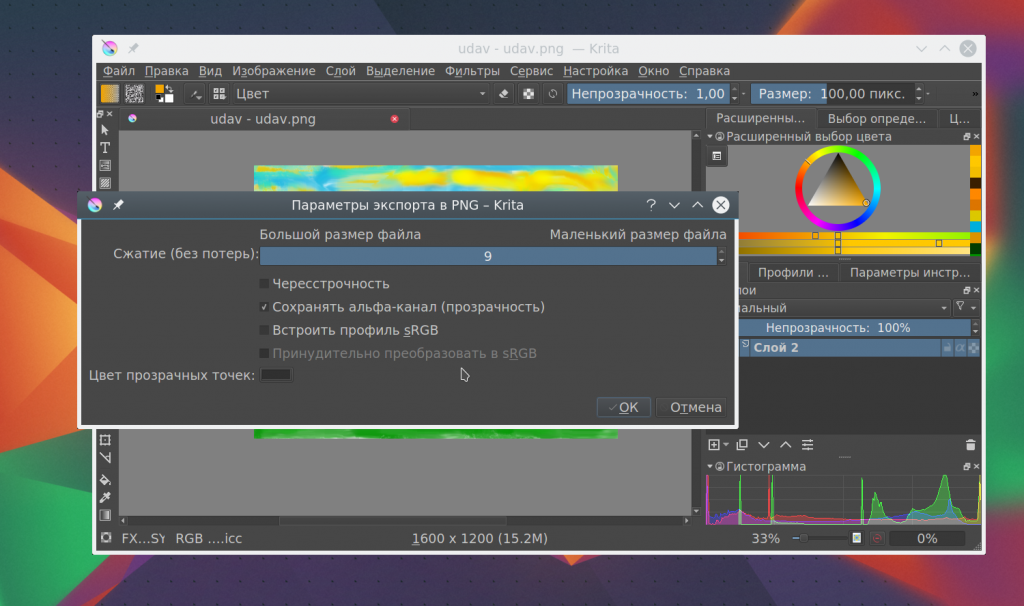
Готово, теперь вы знаете в общих чертах как пользоваться программой Krita.
Выводы
В этой статье мы рассмотрели как рисовать в krita, что можно сделать в этой программе, а также основные моменты работы с ней. Для меня программа показалась проще в плане рисования чем тот же самый Gimp. Хотя здесь и не хватает некоторых инструментов для редактирования. Надеюсь, эта инструкция krita была полезной для вас.
Наложить изображение на объект или текст Krita
Добрый день. Подскажите, как в krita можно наложить изображение (картинку) на объект (по его форме) или на текст? В фотошопе это делается элементарно alt+лкм на нижний слой. А в крите?
Решение найдено благодаря  harlequin78

Именно в krita? Или нужен результат?
Именно в krita? Или нужен результат?
Гимп утром тестировал, хорош по функционалу, то что нужно мне есть, включая это. Но. В krita по богаче будет функционал имхо. Осталось только этот найти.
ну, удачи в поисках.
Смею заранее предположить, что «результат» окажется плохим. И обратить внимание на SVG. Тонкий намёк, так сказать, что ищешь ты не там.
Смею заранее предположить, что «результат» окажется плохим.
И обратить внимание на SVG. Тонкий намёк, так сказать, что ищешь ты не там.
Причём здесь SVG? В фотошопе его также нет, это к вектору, он есть в Illustrator. Следовательно буду смотреть SVG в Inkscape.
Хороший, чорт побери, вопрос! Но ответ придётся найти самому.
Там есть разные типы наложения https://www.youtube.com/watch?v=d28gFnFHVZE Пуляй текст или картинку на новый слой, а затем выбирай каких образом это слой будет накладываться. И да, может я чего не понимаю, но если просто картинку с альфа каналом в криту перетащить то там на выбор добавить как слой и ты просто перемещаешь этот слой по основному изменяешь и прочее как надо.

krita это не фотошоп и даже не его аналог. Это рисовать на компе как на бумаге при помощи графического планшета.
Не аналог, но позволяет вытворять очень разное. Фотошоп к слову тоже многое не может что может гимп и крита. И не может быть их аналогами. В данном случае наложение это то что умеют они все трое и делают это хорошо, каждый по своему.
Фиг знает, GIMP и Фотошоп очень похожи (внешне конечно разные, у гимпа фич меньше).
Там есть разные типы наложения https://www.youtube.com/watch?v=d28gFnFHVZE Пуляй текст или картинку на новый слой, а затем выбирай каких образом это слой будет накладываться. И да, может я чего не понимаю, но если просто картинку с альфа каналом в криту перетащить то там на выбор добавить как слой и ты просто перемещаешь этот слой по основному изменяешь и прочее как надо.
Это смотрел, но не углублённо. Предполагаю что в перемене слоёв и смогу найти ответ. Поищу. Спасибо )
krita это не фотошоп и даже не его аналог. Это рисовать на компе как на бумаге при помощи графического планшета.
Не аналог, но позволяет вытворять очень разное. Фотошоп к слову тоже многое не может что может гимп и крита. И не может быть их аналогами. В данном случае наложение это то что умеют они все трое и делают это хорошо, каждый по своему.
Согласен. И я рассматриваю krita с точки зрения своих потребностей, а не полноценного функционала. Просто нужно заменить действия в фотошопе, действиями в GIMP’e/Krit’e.