Как на python запрограммировать игру пакман
Основа Пакмана. Создать движение и проверку. Условия
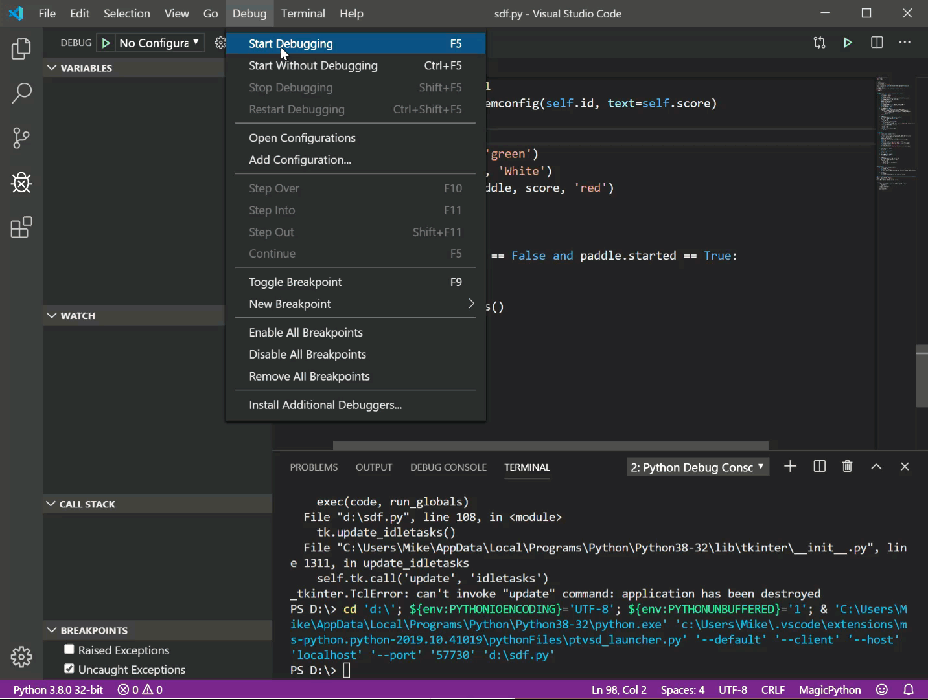
Привет, я занимаюсь питоном. Пишу сейчас основу пакмана. Моя задача — нарисовать круг, который будет «съедать» другой круг. Не совсем понимаю, как сделать так, чтобы при нажатии клавиши движение продолжалось в этом направлении, а также проверку совпадения координат, помогите понять как это сделать. Вот то, что я написал:
 Зaдача на проверку условия
http://i040.***********/1102/b3/e94810696b12.jpg Решите пожалуйста г,д. (Натуральные числа.
Когда while проводит проверку условия
Есть поток threadX. Когда он завершится, нужно вывести месседж бокс о завершении. У потоков нет.
Условия на проверку режима таблицы
Здравствуйте, есть проблема. Пытаюсь проверить условия включена ли таблица в режиме редактирования.
Сообщение было отмечено DefAster78boom как решение
Решение
Вот, постоянное движение
Задача на проверку условия вместимости
Здравствуйте! Ни как не могу решить задачу! Может кто подскажет?
Сделать проверку условия в foreach
есть select, в нем option выстраиваются из БД. нужно проверить, если в сессии уже есть выбраный.
Условия на проверку отсутствия значения в базе
If IbQuery4=nil or IbQuery4=nil or IbQuery4=nil or IbQuery4=nil or IbQuery4=nil or IbQuery4=nil or.
Как на python запрограммировать игру пакман
Pacman in Python with PyGame
Tested with [Python 2.7 in Ubuntu 14.04.3] and [Python 3.5 in Windows 10 64bit]
The MagPi issue 112 out now
Discover 40 amazing projects to make and build with Raspberry Pi Zero 2 W. We are still reeling from the brilliance of Zero 2 W, and hope all our subscribers are enjoying their new free computer. This month, we will take a look at all the incredible things you can make with Raspberry Pi Zero computers.


The concept of Pac-Man is quite simple. Pac-Man eats dots in a maze to score points. Avoid the ghosts unless you have just eaten a power-up, in which case ghosts are tasty. In this series we have gradually introduced new elements of Pygame Zero and also concepts around writing games. This is the first instalment in a two-part tutorial which will show you some more tricks to writing arcade games with Pygame Zero. We will also use some more advanced programming concepts to make our games even better. In this first part, we will put together the basics of the Pac-Man game and introduce the concept of adding extra Python modules to our program.
This article was written by Mark Vanstone and first appeared in The MagPi magazine issue #76. Sign up to our newsletter to get a free digital PDF of The MagPi every month, or click here to subscribe to our print magazine.
Code your own Pac-Man in Python
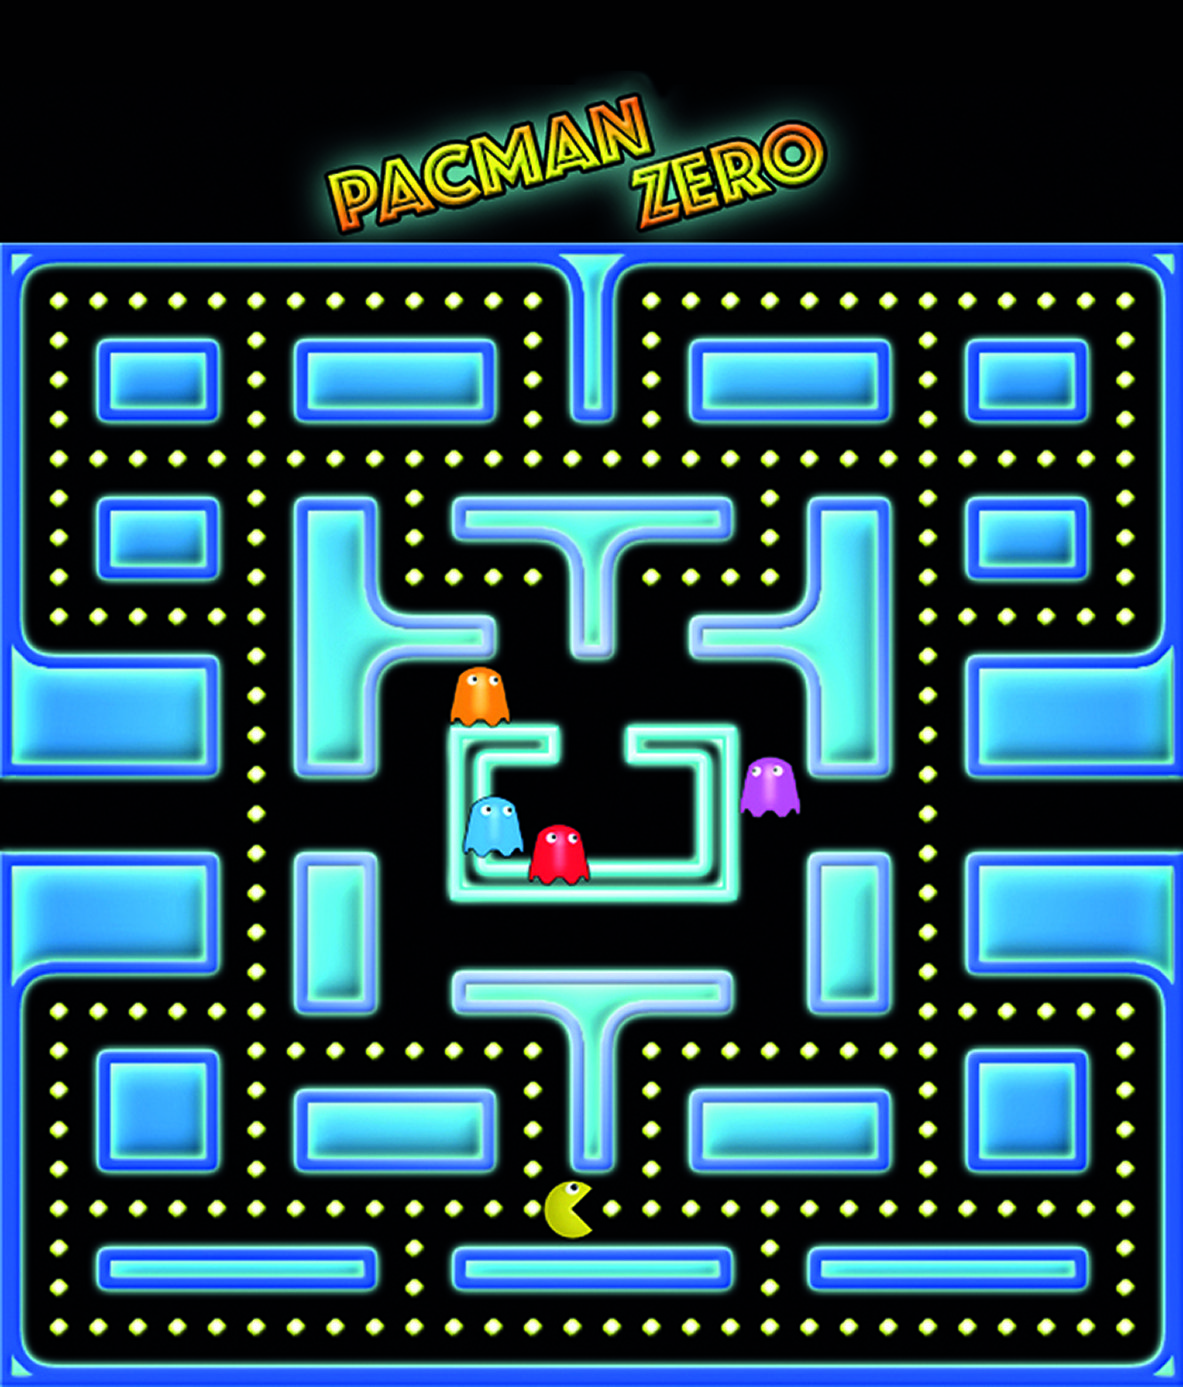
As with the more recent episodes of this series, let’s jump straight in, assuming that we have our basic Pygame Zero setup done. Let’s set our window size to WIDTH = 600 and HEIGHT = 660. This will give us room for a roughly square maze and a header area for some game information. We can get our gameplay area set up straight away by blitting two graphics – ‘header’ and ‘colourmap’ – to 0,0 and 0,80 respectively in the draw() function. You can make these graphics yourself or you can use ours, which can be found on this GitHub repository.
Pac-Man is a-mazing
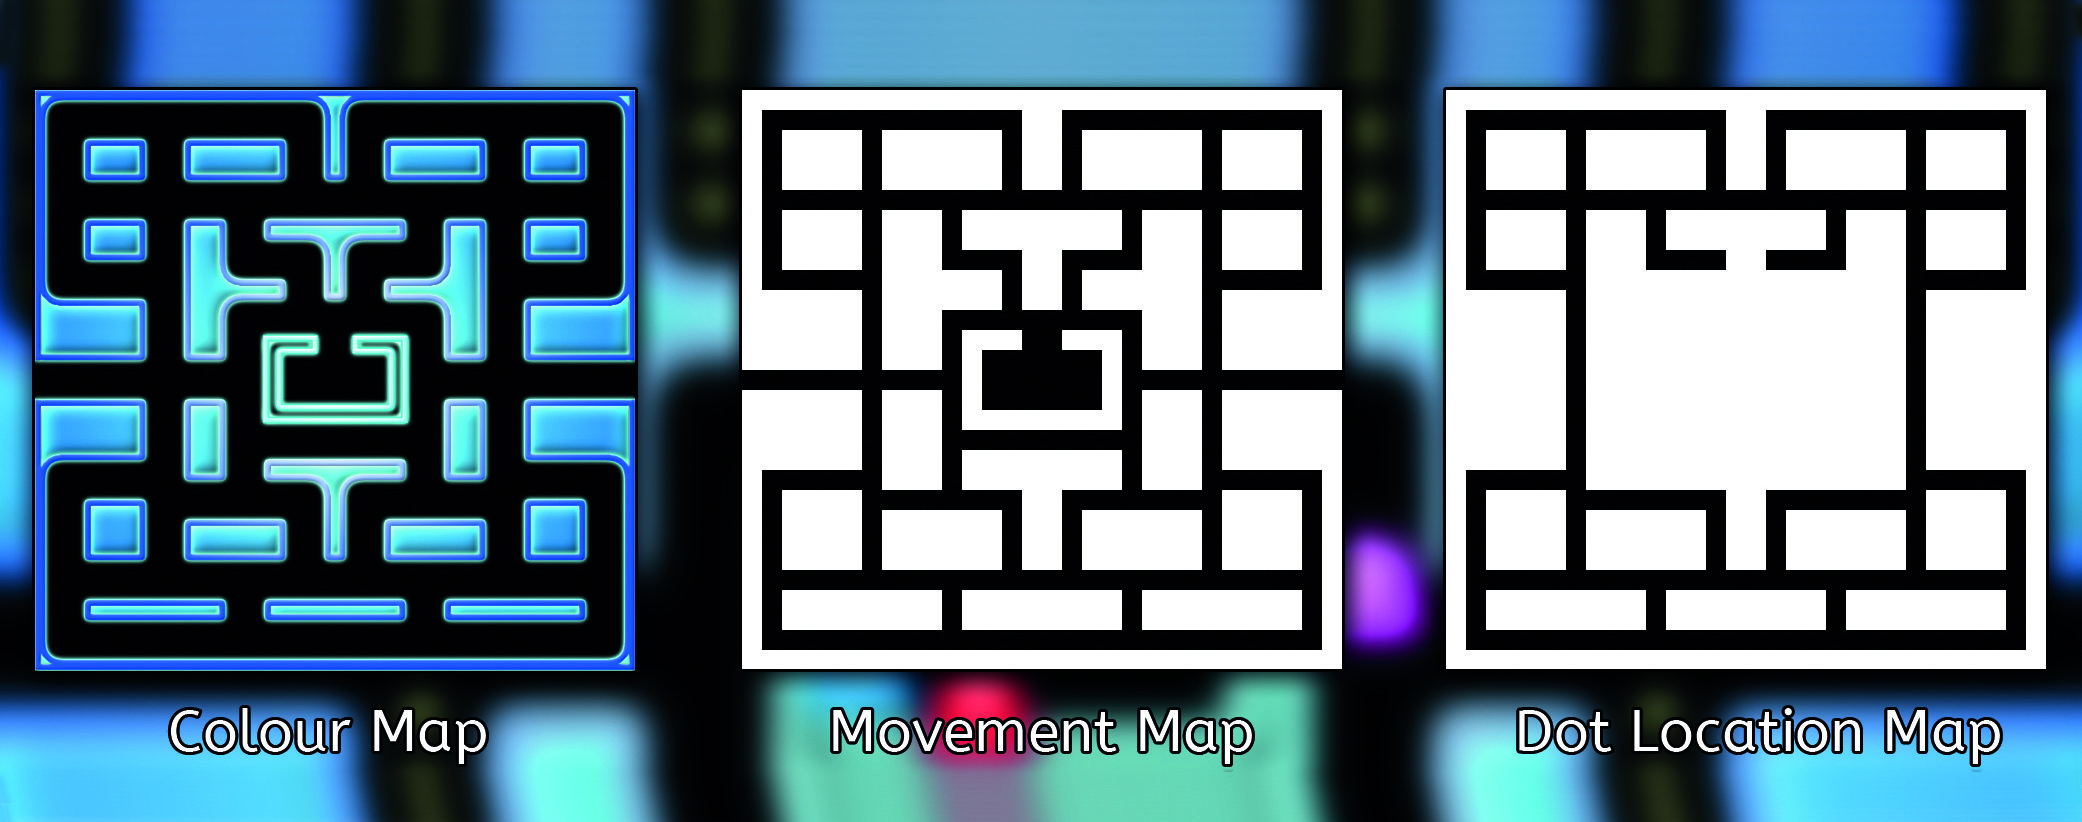
The original game had a very specific layout to the maze, but many different ones have appeared in later versions. The one we will be using is very similar to the original, but you can make your own design if you want. If you make your own, you’ll also have to make two more maps (we’ll come to those in a bit) which help with the running of the game. The main things about the map is that it has a central area where the ghosts start from and it doesn’t have any other closed-in areas that the ghosts are likely to get trapped in (they can be a bit stupid sometimes).
Hmmm, pizza
Our next challenge is to get a player actor moving around the maze. For some unknown reason, the game’s creator, Toru Iwatani, decided to make the main character a pizza that ate dots. Well, the eighties were a bit strange and that seemed perfectly reasonable at the time. We’ll need two frames for our character: one with the mouth open and one with it closed. We can create our player actor near the top of the code using player = Actor(«pacman_o»). This will create the actor with the mouth-open graphic. We will then set the actor’s location in an init() function, as in previous programs.
Code Pac-Man in Python
By Lucy Hattersley. Posted almost 3 years ago.
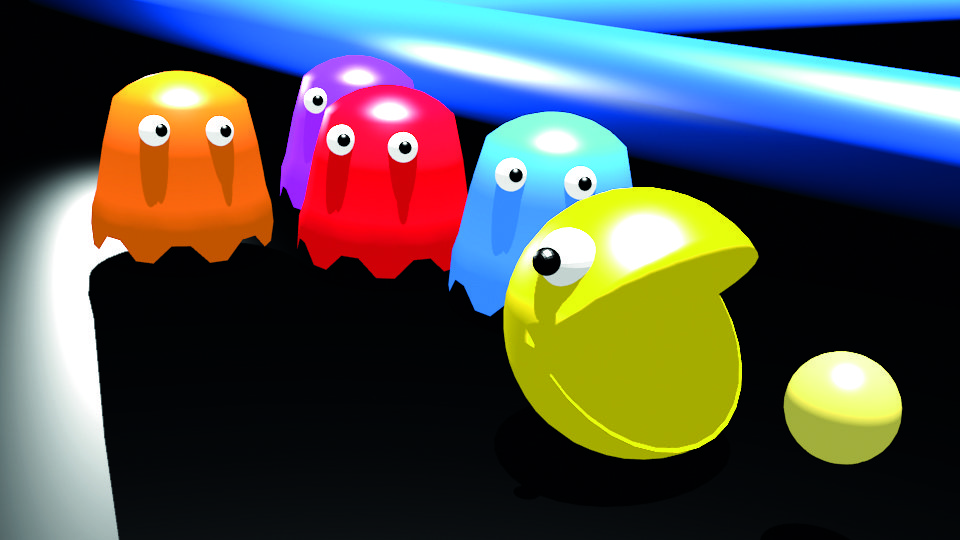
Pac-Man captured the hearts and pocket money of many young people in the eighties. Since then, it has made its way onto just about every computer system and console
The MagPi issue 113 out now
Discover everything you need to know about Raspberry Pi for the year 2022 with our New User Guide. Our January issue is packed with information for newcomers about Raspberry Pi OS (bullseye) along with new information for seasoned hands with Raspberry Pi OS (Legacy). We have all your questions answered alongside in-depth guidance from the engineering team.
The concept of Pac-Man is quite simple. Pac-Man eats dots in a maze to score points. Avoid the ghosts unless you have just eaten a power-up, in which case ghosts are tasty. In this series we have gradually introduced new elements of Pygame Zero and also concepts around writing games. This is the first instalment in a two-part tutorial which will show you some more tricks to writing arcade games with Pygame Zero. We will also use some more advanced programming concepts to make our games even better. In this first part, we will put together the basics of the Pac-Man game and introduce the concept of adding extra Python modules to our program.
This article was written by Mark Vanstone and first appeared in The MagPi magazine issue #76. Sign up to our newsletter to get a free digital PDF of The MagPi every month, or click here to subscribe to our print magazine.
Code your own Pac-Man in Python
As with the more recent episodes of this series, let’s jump straight in, assuming that we have our basic Pygame Zero setup done. Let’s set our window size to WIDTH = 600 and HEIGHT = 660. This will give us room for a roughly square maze and a header area for some game information. We can get our gameplay area set up straight away by blitting two graphics – ‘header’ and ‘colourmap’ – to 0,0 and 0,80 respectively in the draw() function. You can make these graphics yourself or you can use ours, which can be found on this GitHub repository.
Pac-Man is a-mazing
The original game had a very specific layout to the maze, but many different ones have appeared in later versions. The one we will be using is very similar to the original, but you can make your own design if you want. If you make your own, you’ll also have to make two more maps (we’ll come to those in a bit) which help with the running of the game. The main things about the map is that it has a central area where the ghosts start from and it doesn’t have any other closed-in areas that the ghosts are likely to get trapped in (they can be a bit stupid sometimes).
Hmmm, pizza
Our next challenge is to get a player actor moving around the maze. For some unknown reason, the game’s creator, Toru Iwatani, decided to make the main character a pizza that ate dots. Well, the eighties were a bit strange and that seemed perfectly reasonable at the time. We’ll need two frames for our character: one with the mouth open and one with it closed. We can create our player actor near the top of the code using player = Actor(«pacman_o»). This will create the actor with the mouth-open graphic. We will then set the actor’s location in an init() function, as in previous programs.
Modulify to simplify
We can get our player onto the play area by setting player.x = 290 and player.y = 570 in the init() function and then call player.draw() in the draw() function, but to move the player character we’ll need to get some input from the player. Previously we have used keyboard and mouse input, but this time we are going to have the option of joystick or gamepad input. Pygame Zero doesn’t currently directly support gamepads, but we are going to borrow a bit of the Pygame module to get this working. We are also going to make a separate Python module for our input.

It’s a joystick.init
Setting up a new module is easy. All we need to do is make a new file, in this case gameinput.py, and in our main program at the top, write import gameinput. In this new file we can import the Pygame functions we need with from pygame import joystick, key and from pygame.locals import *. We can then initialise the Pygame joystick object (this also includes gamepads) by typing joystick.init(). We can find out how many joysticks or gamepads are connected by using joystickcount = joystick.getcount(). If we find any joysticks connected, we need to initialise them individually – see figure1.py.
Checking the input
Up, down, left, or right
The variable p that we are passing into our checkInput() function will be the player actor. We can test each of the directions of the joystick at the same time as the keyboard and then set the player angle (so that it points in the correct direction for movement) and also how much it needs to move. We’ll set these by saying (for example, if the left arrow is pressed or the joystick is moved to the left) if key.getpressed()[KLEFT] or xaxis

Lucy is Editor of The MagPi, the official Raspberry Pi magazine.
Как написать пакмана на питоне
Pacman by David Reilly
With contributions by Andy Sommerville (2007)

Thank you for your interest in my tribute to everyone’s favorite Pac-Man games of yesteryear! Pacman features 12 colorful levels of varying sizes, bouncing fruit, A* path-finding ghosts, and, more recently, cross-platform support, joystick support, and a high score list. This was the first large-scale project I ever developed in Python, so the source is not the cleanest, but I would love to have your contributions! Feel free to slice and dice it up however you like and redistribute it; I just ask that you give me some credit and let me know about it, so I can enjoy your creation too! Have fun!
Pac-man requires Python 3.x (tested on 3.8), and the corresponding version of the Pygame library, freely available online. Make sure you install the matching (32- or 64-bit) version of Pygame as your Python installation, and the one compatible with your Python version number. The last I checked, only 32-bit binaries of Pygame for Windows were hosted on the official website, but there was a link to download unofficial 64-bit binaries of Pygame as well.
Running the Maze Editor


To run the maze editor in Windows 7 or 8, perform the following steps depending on your version of Windows:
Copy RICHTX32.OCX and COMDLG32.OCX in the libraries/ folder to your Windows SysWOW64 directory for 64-bit Windows, or System32 if you are running 32-bit Windows. The paths are typically «C:\Windows\SysWOW64» and «C:\Windows\System32» respectively. Second, open command prompt as Administrator (click Start, type «cmd» and right-click > Run as Administrator) and run the following commands, making sure to replace the path with the actual path to SysWOW64 (or System32 for 32-bit) on your machine:
regsvr32 C:\Windows\SysWOW64\RICHTX32.OCX regsvr32 C:\Windows\SysWOW64\COMDLG32.OCX
regsvr32 C:\Windows\System32\RICHTX32.OCX regsvr32 C:\Windows\System32\COMDLG32.OCX
Both commands should say the DLL was registered successfully. After that, run pacman/maze_editor.exe and you should be good to go.
Windows under WINE
Haven’t tested this combination, but please let me know if you have, along with any extra steps you had to take, and I will make the changes to this document.
Since the maze editor was written and built in Visual Basic 6, I do have some suggested steps that I’ve adapted from another app written in VB6, Heirowords. Some of the example commands are for a Ubuntu system, but a similar command should be available under any modern Linux system.
sudo apt-get install wine
Install and run winetricks to download the VB6 runtime libraries for Wine
wget http://kegel.com/wine/winetricks chmod +x winetricks sudo mv winetricks /usr/bin/winetricks winetricks
When winetricks opens, select the package «vb6run» and install it.
Copy COMDLG32.OCX and RICHTX32.OCX from the libraries/ folder to your Wine system32 directory, probably
Please let me know if you have any luck with these steps, or have any suggestions, etc. Good luck and enjoy the maze editor!
Using the Maze Editor
Background and How it Works
Skip to the Quick Start section below if you’re not interested in the technical details! 🙂
The maze editor will expect to find a res/ directory in the path to the maze editor executable; otherwise, it will not work. It should be set up this way by default. In addition to the contents of the res/tiles/ directory, it also looks for res/crossref.txt (for tile descriptions and code values), res/sprite (for fruit graphics), and will default the level open dialog box to the res/levels directory.
Each level is simply a text file with some level properties at the beginning, followed by a # startleveldata tag which introduces the level data itself, and then finally an # endleveldata tag and tag for # sprites (not used).
In the level data section, each line corresponds to one row of tiles on the screen, and each tile consists of the tile’s numeric value as found in crossref.txt, separated from the next tile by a space character. If you’re not sure what a particular tile number corresponds to, you can look it up in crossref.txt.
If you know what a tile looks like, but you’re not sure of its number, you can click on it in the maze editor tile pallette, and some information will appear above, including the tile’s name, description, and tile number. The latter is what gets used in the level description files.
Of course, the simplest way to make a level is just to use the maze editor and make heavy use of the «x-paintwall» special tile, which will paint walls with connections to adjacent walls, so you don’t have to worry about it. The «x-paintwall» tile is shown here:

Set your level size to have an odd number of columns (x-width), and turn on «Symmetric editing mode» to make things really efficient. This technique was used in nearly all levels that come with the game.
Happy editing! Please send me your creations; I may put level packs together for the best ones I see and distribute them with the game.
Ability to re-use same level sets, maze editor, and most of the res/ directory between both versions of pacman.
Consolidating pacman original (16×16) with pacman-large (24×24) into one source file, or set of source files.
Source for the Maze Editor (written in VB6)
About
Faithful Pac-Man adaptation using PyGame including bouncing fruit, ghosts that chase you with the A* algorithm, and support for external mazes of any size with custom color schemes for each maze. Cross-platform, high score, and joystick support.
Пишем игру на Python
Прежде чем мы начнём программировать что-то полезное на Python, давайте закодим что-нибудь интересное. Например, свою игру, где нужно не дать шарику упасть, типа Арканоида. Вы, скорее всего, играли в детстве во что-то подобное, поэтому освоиться будет просто.
Логика игры
Есть игровое поле — простой прямоугольник с твёрдыми границами. Когда шарик касается стенки или потолка, он отскакивает в другую сторону. Если он упадёт на пол — вы проиграли. Чтобы этого не случилось, внизу вдоль пола летает платформа, а вы ей управляете с помощью стрелок. Ваша задача — подставлять платформу под шарик как можно дольше. За каждое удачное спасение шарика вы получаете одно очко.
Алгоритм
Чтобы реализовать такую логику игры, нужно предусмотреть такие сценарии поведения:
Хитрость в том, что всё это происходит параллельно и независимо друг от друга. То есть пока шарик летает, мы вполне можем двигать платформу, а можем и оставить её на месте. И когда шарик отскакивает от стен, это тоже не мешает другим объектам двигаться и взаимодействовать между собой.
Получается, что нам нужно определить три класса — платформу, сам шарик и счёт, и определить, как они реагируют на действия друг друга. Поле нам самим определять не нужно — для этого есть уже готовая библиотека. А потом в этих классах мы пропишем методы — они как раз и будут отвечать за поведение наших объектов.
По коням, пишем на Python
Для этого проекта вам потребуется установить и запустить среду Python. Как это сделать — читайте в нашей статье.
Начало программы
Чтобы у нас появилась графика в игре, используем библиотеку Tkinter. Она входит в набор стандартных библиотек Python и позволяет рисовать простейшие объекты — линии, прямоугольники, круги и красить их в разные цвета. Такой простой Paint, только для Python.
Чтобы создать окно, где будет видна графика, используют класс Tk(). Он просто делает окно, но без содержимого. Чтобы появилось содержимое, создают холст — видимую часть окна. Именно на нём мы будем рисовать нашу игру. За холст отвечает класс Canvas(), поэтому нам нужно будет создать свой объект из этого класса и дальше уже работать с этим объектом.
Если мы принудительно не ограничим скорость платформы, то она будет перемещаться мгновенно, ведь компьютер считает очень быстро и моментально передвинет её к другому краю. Поэтому мы будем искусственно ограничивать время движения, а для этого нам понадобится модуль Time — он тоже стандартный.
Последнее, что нам глобально нужно, — задавать случайным образом начальное положение шарика и платформы, чтобы было интереснее играть. За это отвечает модуль Random — он помогает генерировать случайные числа и перемешивать данные.
Запишем всё это в виде кода на Python:
Мы подключили все нужные библиотеки, сделали и настроили игровое поле. Теперь займёмся классами.
Шарик
Сначала проговорим словами, что нам нужно от шарика. Он должен уметь:
Платформа
Сделаем то же самое для платформы — сначала опишем её поведение словами, а потом переведём в код. Итак, вот что должна уметь платформа:
А вот как это будет в виде кода:
Можно было не выделять счёт в отдельный класс и каждый раз обрабатывать вручную. Но здесь реально проще сделать класс, задать нужные методы, чтобы они сами потом разобрались, что и когда делать.
От счёта нам нужно только одно (кроме конструктора) — чтобы он правильно реагировал на касание платформы, увеличивал число очков и выводил их на экран:
У нас всё готово для того, чтобы написать саму игру. Мы уже провели необходимую подготовку всех элементов, и нам остаётся только создать конкретные объекты шарика, платформы и счёта и сказать им, в каком порядке мы будем что делать.
Смысл игры в том, чтобы не уронить шарик. Пока этого не произошло — всё движется, но как только шарик упал — нужно показать сообщение о конце игры и остановить программу.
Посмотрите, как лаконично выглядит код непосредственно самой игры:
Что дальше
На основе этого кода вы можете сделать свою модификацию игры:
Как я писал Pacman’a, и что из этого получилось. Часть 1
Здравствуйте, уважаемые хабралюди!
Последние несколько месяцев, в свободное время, я занимался разработкой клона знаменитой игры Pacman для ОС Android. Как это было, и что из этого вышло я хочу рассказать.
Почему Pacman?
Ответ на этот вопрос достаточно прост, и, возможно, уже мелькнул в мыслях кого-то из читателей. Да, совершенно верно, это было тестовое задание для компании ZeptoLab. Из требований этого задания понятны и инструменты, использованные при разработке: Android NDK, C++, OpenGL.
Pacman: начало
Итак, решение принято, инструменты выбраны. Что дальше? Опыта работы с Android NDK нет, опыт работы с OpenGL ограничивается теорией и лабораторными работами из курса компьютерной графики 2011 года. Опыт разработки на С++ есть, но не в геймдеве. Что ж, приступим.
Первое, что я сделал, это установил Android NDK (установка подробно расписана на множестве ресурсов, как иностранных, так и рунета) и запустил несколько примеров из его поставки: во-первых пример GL2JNI, во-вторых SanAngeles. Первый выводит треугольник при помощи OpenGL ES 2.0, второй показывает 3D-ролик, собранный из примитивов, используя OpenGL ES. Код выглядит на первый взгляд жутковато. Да и на второй тоже. Собственно, отправной точкой для меня стал файл gl_code.cpp из проекта GL2JNI.
Почему OpenGL ES 2.0?
Конечно, для простой 2D-игры вполне достаточно статического конвейера OpenGL ES, никаких шейдеров не надо, зачем все это? Ответ: хотелось попробовать. В лабораторных работах по компьютерной графике пощупать шейдеры не удалось, так почему бы не наверстать упущенное?
Изучение OpenGL ES 2.0 начал отсюда, с хабрахабра, с перевода статьи All about OpenGL ES 2.x – (part 1/3). К сожалению, сейчас найти перевод не могу, возможно, автор убрал его в черновики. Автор статьи говорит об OpenGL ES 2.x применительно к iOS, но практически все то же самое верно и для Android. Дочитав первую часть на русском и поняв, что этого мало, я устремился на англоязычные ресурсы (в основном — часть 2 и 3 приведенной выше статьи, но и другие источники тоже использовал), где и почерпнул все знания по OpenGL ES 2.0, которые использовал впоследствии.
Настало время для скриншота
Загрузка текстур
Карта
С самого начала разработки я думал о том, каким сделать механизм загрузки уровней. Сходу на ум приходят варианты «захардкодить» и «читать из текстового файла». Это, конечно можно, но тогда ни о какой легкой правке карт говорить не приходится. В голову приходят мысли о редакторе уровней, тем более недавно видел вкусную статью… Нет! Так за деревьями леса не видно будет. Напоминаю себе, что цель – рабочий Pacman и как можно быстрее.
Но ведь только что я научился загружать png! Пикселами разных цветов обозначим клетки стен, еды, пустого пространства, Pacman’а и т.д. А Paint вполне подойдет в качестве редактора уровней. Размер карты может варьироваться, вплоть до 32х32.
Этот подход оправдал себя на 100%. Я получил очень легко редактируемые уровни практически бесплатно.

Логика игровых персонажей
В игре помимо Pacman’a присутствуют монстры-противники. Каждый из них должен уметь двигаться по лабиринту, сталкиваться со стенами, есть друг друга, в конце концов. Их логика реализована в виде конечных автоматов (StateMachine). Для унификации была выстроена иерархия:
StupidMonster и CleverMonster отличаются своим поведением, задаваемым методом newDirectionEvent() : StupidMonster ходит по лабиринту случайным образом, не обращая внимания на Pacman ’a. CleverMonster гонится за Pacman ’ом по самому оптимальному маршруту. В этом месте я фактически реализовал велосипед, который по-научному называется шаблоном проектирования «Стратегия»
Поиск оптимального пути.
Итог первой части
Таким был итог почти трех недель разработки. Монстры бегают за Pacman’ом, Pacman ест еду и умеет умирать три раза. Пользователь может поставить игру на паузу, перейти на следующий уровень при победе, или вернуться в меню и выбрать другой уровень. Pacman’ анимирован, монстры – нет. Об анимации Pacman’а я подробнее напишу в следующей части.
В таком виде задание было отправлено на проверку в ZeptoLab, после чего меня пригласили на собеседование. Скажу честно – ни до, ни после этого я так не волновался и не тупил на самых простейших вопросах. По моим ощущениям, это был epic fail. Мне посоветовали прочитать несколько книг по алгоритмам и С++, предложили встретиться еще раз в феврале. Об игре был отзыв HR: «Одна из лучших присланных работ». И, кстати, я все еще ищу работу.
Проект в открытом доступе на github. И в Google Play Market Ссылка убрана, чтобы не было рекламы в профильных хабах.