Работа с текстом с программе трехмерного моделирования «Blender»
В последние годы в одним из наиболее актуальных направлений в школах стало изучение 3D-моделирования в рамках элективных курсов и внеурочной деятельности. В образовательных организациях открываются 3D-лаборатории, оснащенные 3D-принтерами и материалами к ним, на выбор предлагается различное программное обеспечение.
Одной из наиболее популярных сред для создания трехмерных моделей является программа «Blender». Данная программа свободно распространяется и имеет достаточно функций для создания 3D-объектов, которые впоследствии можно распечатать на 3D-принтере.
Одной из наиболее яркой возможностью данной среды является работа с 3D-текстом. Вашему вниманию приводятся алгоритмы создания 3D-текста, а также создания эффекта «Ледяного текста».
Алгоритм создания 3D-текста в программе «Blender»
1. Настройки шрифтов в программе: нажимаем Ctrl + Alt + u, вкладка File, выбираем самый первый раздел fonts (шрифты) – папку Windows – fonts. Нажимаем кнопку «Accept».
2. Добавляем текст: команды Schift + A.
3. Чтобы ввести свой текст: нажимаем клавишу tab, удаляем шаблон текста и вводим свой.
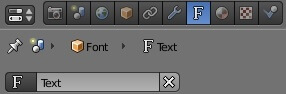
4. Чтобы текст отобразился надо поменять шрифт: в левом столбце нажать F.

Затем внизу столбца выбрать команду Font и там открыть обычный шрифт.

Затем выбрать например шрифт: Meiryo и выйти из редактирования (Tab).
5. Затем, в разделе «Геометрия» настраиваем параметры:

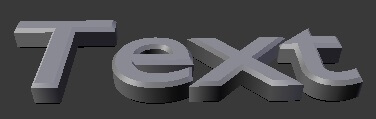
Сначала выбираем «Выдавливание» (оно дает объём), параметр «Разрешение» дает сглаживание углов.
6. Чтобы изменить расстояние между буквами: нажимаем клавишу Tab, стрелкой перемещаемся между буквами, затем кнопками alt + стрелка меняем расстояние между буквами.
7. Добавляем плоскость.
8. Красим плоскость и текст.
9. Нажимаем клавишу F12.
10. Сохранить картинку в рендеринге: в левом нижнем углу нажать команды: изображение – сохранить как.
Алгоритм создания эффекта «Ледяной текст» в программе «Blender»
1. Создать текст;
2. Внизу текста добавить плоскость;
3. Войти в режим «Орто», перед текстом нарисовать куб, выбрать для него режим редактирования и поместить в него текст;
4. Сверху нарисовать вторую плоскость
5. Делаем ее источником света:
6. Затем выделяем нижнюю плоскость и для нее создаем новый материал с настройками по умолчанию;
7. Переходим на вкладку мира и меняем цвет на синий;
8. Добавляем окно шкалы времени (ставим от 1 до 20);
9. Теперь выделяем текст и преобразовываем в его в мэш-объект;
10. Нажимаем кнопки Alt+C и выбираем 2-ю команду;
11. Переходим на вкладку «Физика»;

12. Выбираем вещество «FLUID» (жидкость) и тип выбираем тоже «FLUID»

13. Теперь выделяем куб;
14. Для него также выбираем вещество «FLUID», а тип «Domen»

15. В окне «Outliner» скрываем старый текст;
16. Выбираем «Outliner», раздел структура проекта, затем команда «Text» и отключаем иконки глаз и фотокамера;
17. Переходим в меню «Свойства», затем на вкладку материалов;
18. Создаем новый материал, указываем тип поверхности «BFSD» (стекло);
19. Выставляем рендер и смотрим картину.
Работа с текстом в Blender
Поделитесь этой страницей с друзьями:
В этом уроке рассматривается работа с текстом в Blender. Мы разберем возможность создания текстовых объектов в Blender 2.5 и некоторые простые манипуляции с этими объектами. Для более поздних версий (включая Blender 2.8) последовательность действий будет примерно той же, принципы работы с текстом изменились мало.
Создайте в сцене текст ( Add → Text ). На панели Object Data (которая по-умолчанию находится справа) появится новая вкладка для работы с текстом:
Обратите внимание на область Geometry в этой вкладке:
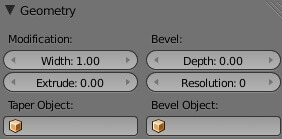
Последовательно поменяйте значения полей в области Geometry как указано ниже и посмотрите, как меняется текст после каждого изменения.

Теперь перейдем к области Shape на той же вкладке (по умолчанию она находится прямо над областью Geometry :
Посмотрим, что будет, если поменять значение параметра Preview U на 1 :
Не самый лучший вариант, не правда ли? Вернем как было.
Уберем (затем вернув на место) галочку напротив пункта Front :

Уберем (затем вернув на место) галочку напротив пункта Back :
Уберем (затем вернув на место) обе галочки ( Front и Back ):
Включим режим быстрого редактирования текста (для этого поставьте галочку напротив пункта Fast Editing ):
Теперь рассмотрим область Font на той же вкладке:
При изменении параметра Shear (сдвиг) получим такой результат:
Наконец, при помощи области Paragraph вы можете управлять выравниванием текста и отступами:
Вот некоторые результаты манипуляций с параметрами в этой области:

Понравилась статья? Поделитесь ссылкой с друзьями:
Text EditorпѓЃ
HeaderпѓЃ
The newly opened Text editor is empty, with a very simple header. More options become available when a text file is created or opened.


Text header with a text loaded. пѓЃ
The standard editor selection button.
Resolves modified file conflicts when an external text file is updated from another program.
Opens the file from drive again, overriding any local changes.
Make Text Internal
Converts the external text data-block into an internal one.
Hides the warning message until the external text file is modified externally again.
A data-block menu to select a text or to create a new one. After that the header will change.
Run Script (play icon)
Toggle display options.
Line Numbers, Word Wrap, Syntax Highlighting
Script Node Update (refresh icon)
When an OSL-file is opened, this updates the Shader Script node with new options and sockets from the script.
View MenuпѓЃ
Displays the text file’s line numbers on the left of the Main View.
Wraps words that are too long to fit into the horizontal space by pushing them to a new “pseudo line”.
Colors special words, in the Main View, that are used in the Python programming language.
Emphasizes the active line by altering the color of the background.
Moves the view and cursor to the start of the text file.
Moves the view and cursor to the end of the text file.
Moves the cursor to the start of the current line.
Moves the cursor to the end of the current line.
Moves the cursor to the same position in the line above the current line.
Moves the cursor to the same position in the line below the current line.
Moves the cursor to the beginning of the previous word. If the cursor is in the middle of a word, the cursor is moved to the beginning of the current word.
Moves the cursor to the end of the next word. If the cursor is in the middle of a word, the cursor is moved to the end of the current word.
Text MenuпѓЃ
Creates a new text Data Block.
Reopens (reloads) the current buffer (all non-saved modifications are lost).
Saves an already open file.
Saves text as a new text file, a File Browser is opened to select the directory to save the file along with giving the file a name and file extension.
Run the text data-block as a Python script on loading the blend-file. Read more about the registration of Python modules in API documentation.
Executes the text as a Python script, see Running Scripts for more information.
Edit MenuпѓЃ
Cuts out the marked text into the text clipboard.
Copies the marked text into the text clipboard.
Pastes the text from the clipboard at the cursor location in the Text editor.
Duplicates the current line.
Swaps the current/selected line(s) with the above.
Swaps the current/selected line(s) with the below.
Shows the Find & Replace panel in the Sidebar.
Finds the next instance of the selected text.
Shows a pop-up, which lets you select a line number where to move the cursor to.
Text Auto Complete Tab
Shows a selectable list of words already used in the text.
Converts the text file to a Text Object either as One Object or One Object Per Line.
Select MenuпѓЃ
Selects the entire text file.
Selects the entire current line.
Word double-click LMB
Selects the entire current word.
Selects everything above the cursor.
Selects everything below the cursor.
Selects everything between the beginning of the current line and the cursor.
Selects everything between the cursor and the end of the current line.
Selects everything between the cursor and the position of the cursor one line above.
Selects everything between the cursor and the position of the cursor one line below.
Selects everything between the cursor and the beginning of the previous word. If the cursor is in the middle of a word, select everything to the beginning of the current word.
Selects everything between the cursor and the end of the next word. If the cursor is in the middle of a word, select everything to the end of the current word.
Format MenuпѓЃ
Inserts a tab character at the cursor.
Unindents the selection.
Toggles whether the selected line(s) are a Python comment. If no lines are selected the current line is toggled.
Converts indentation characters To Spaces or To Tabs.
Template MenuпѓЃ
The Text Editor has some dedicated Python scripts, which are useful for writing tools, like a class/function/variable browser, completion…
Python, OpenShading Language
Main ViewпѓЃ
Typing on the keyboard produces text in the text buffer.
As usual, pressing, dragging and releasing LMB selects text. Pressing RMB opens the context menu.
Usages for the Text editor
The Text editor is handy also when you want to share your blend-files with others. The Text editor can be used to write in a README text explaining the contents of your blend-file. Be sure to keep it visible when saving!
SidebarпѓЃ
Find & ReplaceпѓЃ
Searches for instances of a text that occur after the cursor. Using the eyedropper icon will search for the currently selected text and sets the selection to the match. Find Next searches for the next instance of the text.
Searches for the text specified in Find Text and replaces it with the new text. Using the eyedropper icon will set the currently selected text as the replace text. Replace searches for the next match and replaces it. Replace All searches for the match and replaces all occurrences of the match with the new text.
Search is sensitive to upper-case and lower-case letters.
Search again from the start of the file when reaching the end.
Search in all text data-blocks instead of only the active one.
PropertiesпѓЃ
Shows a right margin to help keep line length at a reasonable length when scripting. The width of the margin is specified in Margin Column.
The size of the font used to display text.
The number of character spaces to display tab characters with.
Use Tabs or Spaces for indentations.
FooterпѓЃ
The Text editor footer displays if the text is saved internal or external and if there are unsaved changes to an external file. For external files, this region also displays the file path to the text file.
UsageпѓЃ
Running ScriptsпѓЃ
© Copyright : This page is licensed under a CC-BY-SA 4.0 Int. License. Last updated on 12/28/2021.
Want to master Blender? Click here! and get our E-Book
In this article we will take a deep dive into the text object, what options and features we have as well as some common 3D effects that we may want to use our text for in Blender.
To create 3D text, go to the add menu in the 3D viewport and choose text. Press tab, erase the text and type what you want. Next, go to the geometry section in the object data tab and increase the extrude value. Press tab to go to object mode and right click and choose convert to mesh.
Let’s continue to explore.
Introduction to text in Blender
When we talk about text in Blender, we may refer to multiple things.
We may refer to text in Blenders text editor where we write scripts. It can also be text for the video sequence editor in the form of text on screen or perhaps subtitles just to name a few examples.
Here, we focus on the text object, as part of our 3D scene. Whenever I refer to text, it is in the context of the text object if nothing else is mentioned.
We will start with some basics.
How to add or change text in Blender
To add a text object, we press Shift+A in the 3D viewport and choose text. To change the text we then press Tab to go into edit mode. We can now erase the default text and write anything we want.
Something important to understand, is that text objects are based on curve objects. Therefore, many settings are inherited from curve objects. Each letter is made up of one or more curves. Just keep this in mind as we continue to learn more about text.
We only have two modes available with a text object. Object mode and edit mode. In object mode we have our regular transformations available. Move, rotate and scale. We can use these transformations to make basic changes.
Note though that just like with any other kind of object, if we scale or rotate we may have to apply the scale and rotation. This is if our tools and modifiers don’t work as expected.
When a text object is scaled, applying the scale will readjust the text size to whatever size that fits the scale of the object. Any uniform scaling will be lost and the font will regain its default ratio.
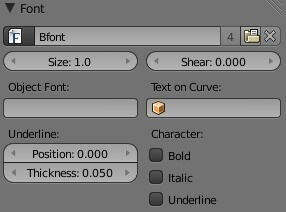
We can also change the text size directly. Find the object data properties in the properties panel, represented by a green lower case «a» icon. Here you will find the text settings.
In the font section we will find the transform subsection. The first property here is the size. This is the value Blender will adjust after we apply a scaled text object.
In this section we also have a shear slider to angle the letters.
Writing text in edit mode
When we press tab and enter edit mode, creating text is just like any other text based application. We can write and move the cursor with the arrow keys.
To select text, we can hold shift while pressing the arrow keys to select more letters forward or backwards.
While in edit mode we also get four extra buttons in the font section.
To use any of these features on our text, we first need to select the text in edit mode. Hold shift and an arrow key to select.
But clicking any of these buttons, even with selected text, will have no effect on the text though. This is because by default, the bold and italic fonts are the same as the regular.
How fonts work in Blender
You have probably already seen where we change the font, right in the font section. There are four input widgets.
By default, all is set to Bfont, Blenders default font. This is why nothing happens when we tried to make part of our text bold or italic.
Whenever we change a font from regular to bold, italic or both, we really change font for the selected portion of the text. Most fonts we use have multiple versions to account for these different styles.
In Blender, we have to browse for these fonts and input them for each text object. This also means that we can input any font we want for the italic or bold version. So if we use multiple fonts in the same text object and know that we don’t need a bold or italic version, we can just insert any font we want and use bold and italic to switch between them.
Press the folder icon in either of the font slots and browse for your font file. You can also click the «F» to choose any font that is already loaded into the blend file.
On Windows, the browser will automatically open to «c:\windows\fonts». You can change this folder in the preferences. Go to «Edit→Preferences» and find the «file path» section. At the top is the font folder setting.
While using the browser, if you know the name of a font you can search for it in the top right corner. Searching for a font will filter the view in real-time and generally, you will find all versions available with slightly different names. A trailing «B» often represents the bold version and a trailing «I» the italic.
I will input the Arial font into the bold slot to test. However, the buttons to change style still don’t work. Currently, there seems to be a bug in Blender where pressing these buttons don’t work. But if you are still having problems with the current Blender version as you read this, you can use the shortcut keys.
You can change these shortcuts by going into Edit→Preferences and find keymap. Select name and search for «toggle style» and you will filter to only these four keymaps.
The underline and small caps styles don’t have dedicated fonts. These are just style changes. In the transform subsection we also find three related settings. The underline position will raise or lower the underline while underline thickness, increases or decrease the thickness.
The small caps scale changes the size of text with this effect. We can change the slider from 0 to 1, but any number can be typed in. Even negative.
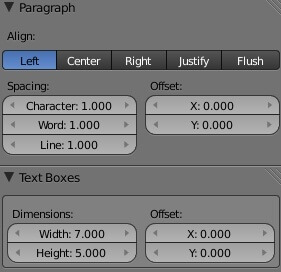
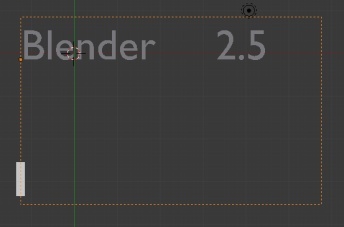
Let’s move on to explore the Paragraph section. Here we will find settings for text alignment. The alignment is in relation to the object origin, and we can change both the horizontal and vertical alignment.
In the spacing subsection we have options to adjust spacing between letters, words and lines. There is also an offset for X and Y. The offsets here probably have more to do with alignment than spacing since it just moves the text in these directions.
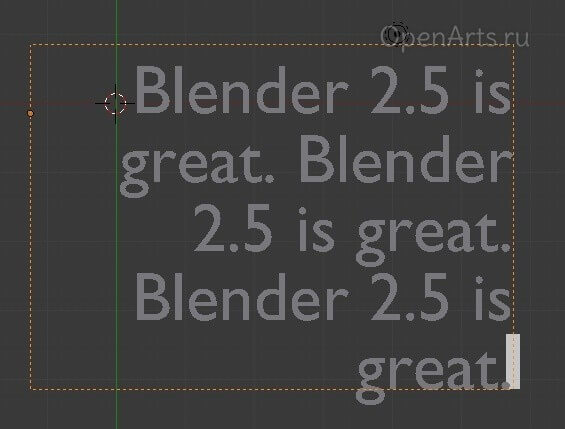
Next we have the Text boxes section. For longer texts we can use this to layout our text into different boxes. Text that is so long that it spans multiple boxes will overflow into the next box.
In edit mode we can see an outline of each box making it a bit easier to understand.
The overflow setting will decide what happens to text that does not fit in the boxes. We can have it overflow in the vertical direction of the last box, truncate it, just removing text or size the text to fit inside.
How to make 3D text in Blender
So far, all our text is still 2D. To convert our text into 3D there are two sections in the object data properties that we need. The shape section and the geometry section.
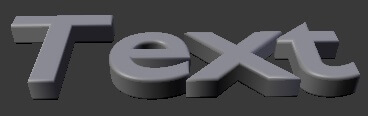
The easiest way to get started is to go straight to the geometry section and increase the extrude slider. As we increase the slider, geometry will be added equally in the local positive and negative Z direction of the text.
You may think that the offset slider will offset the text in the Z direction but this is not the case. Instead, it is offset in the local X and Y direction for each letter. Be careful with this setting as it may quickly create overlapping geometry.
Taper
The taper is a bit odd. My understanding of tapering is that we take one curve, add geometry to it and use another curve to tell the thickness along the first curve.
Blenders text object is based on curves behind the scenes, but we can’t decide where each curve that make up a letter start or end. Therefore, each curve making up the letter gets a taper from start to end according to the taper object. But we can’t control the outcome very much.
If you want some cartoon looking text, try it out. In all other cases, I can’t find a use for this currently. But it helps to deepen the understanding of how letters are built, and that is interesting I think.
Bevel
The bevel settings are pretty straight forward. The depth parameter decides the thickness of our bevel. Careful here, it is easy to get overlapping geometry with too high values.
The resolution tells Blender how many loop cuts to put along each bevel, making it smoother with higher numbers. But going beyond 5 or 6 is probably overkill.
Next we have an object slot. This takes a curve object as input. We can use this to shape the profile of the bevel. But not in the way you might think. This is an example of what we can create with a bevel object and a closed curve.
You can switch the curve object from cyclic to non-cyclic with Alt+C in edit mode.
In this case we also have to go to the shape section and change the fill mode to none.
In this case when we use it together with a curve object we have to be careful with artifacts though. This can be pretty difficult to deal with depending on the shape and scenario.
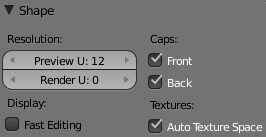
Shape
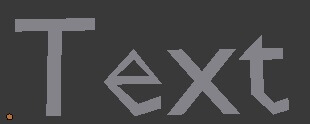
In the shape section we also have the resolution setting. The resolution preview u parameter will increase the amount of geometry in the letters. For instance this is a text with a resolution of 2 compared to a resolution of 12.
We can change the render U resolution, but with a value of 0 it will inherit the resolution from the preview.
The fast editing will hide the text in edit mode in order to speed up the typing experience. This is generally not needed in my experience.
We already touched on the fill mode. It essentially decides if we want to fill the front, back, both or no part of the surface. In the curve example above we choose to only let the edges remain, and then we created the geometry through the bevel alone.
Convert text to mesh object
To convert a text object to mesh we select the text object in object mode, right click and choose Convert to mesh.
This is a common practice because most times we want to have control over the mesh. A few examples are that we may want to use a different set of modifiers that isn’t available for text object. We may also want to simulate the text. For instance, have the letters fall in a pile with rigid body simulation.
Often, the best way to create and modify the text may be to just write it in a text object, then immediately converting it to mesh just because of the large variety of tools and precise control we get access to.
For example, we can use the bevel modifier and get much more control compared to the bevel feature on the text object.
Before we can start to use all mesh tools, we generally have to create a better topology on our text.
How to create even mesh for a converted text object
In my article on 30 Blender modeling tools I suggested a combination of «beautify faces» followed by a «tris to quads» operation. You can find it in this article.
This is a fairly quick way to get a more even geometry in many cases without increasing the amount of geometry. However, if this does not work in our case. For instance, we could have a very complex font to work with. We may try another method. Most likely remeshing or manual retopology. We will look into remeshing here since it will be the way to go in almost ever case, where the above does not work.
In Blender, we have two ways of remeshing. There is a remesh modifier and the remesh tools we find in the object data tab.
In this case I find the remesh modifier easier to work. That is because we get much better feedback on our changes, so we will look into that.
Keep in mind that in order for this method to work we need some depth to our text. We can create it with the extrude setting while our object is still a text object. But if we already converted we can use the extrude tool in edit mode or add a solidify modifier above the remesh in the modifier stack.
Change the mode to sharp and deselect remove disconnected pieces. In my case an Octree depth of 6 worked well and then I adjust the scale.
Here is an example where I animate the scale value between 0.2 and 0.990.
From here we have a much better starting point. But remember to not add more geometry than you need for your text to be even. If you need denser geometry you can always add a subdivision surface modifier set to either simple, or catmull-clark if you want the curvature.
Blender text effects
There is an endless variation of text effects and animations that we can create in Blender. I will show a few simpler ones here that you can use to get your mind spinning.
When doing this we are quite dependent on modifiers and if you are unfamiliar with them you can read more about them here:
You can also learn some of the most common modifiers here:
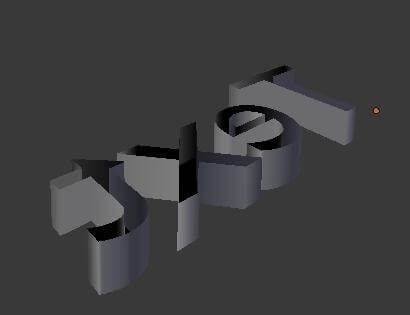
Blocks
Let’s start by looking at some block text. Here is an example:
We can achieve this style with a few modifiers.
We will start with an object that has some thickness and is converted to a mesh object. Then we will start by adding modifiers to this object. First we add the remesh modifier to get a workable mesh as described above.
After that we add a bevel modifier. Make sure that clamp overlap is deselected. At this point it does not matter if our topology is a bit overlapping. I changed the width to about 0.05 and set the limit method to «angle».
Next I add another remesh. This time I set it to the blocks method. In my case an octree depth of 8 and a scale of 0.35 worked well.
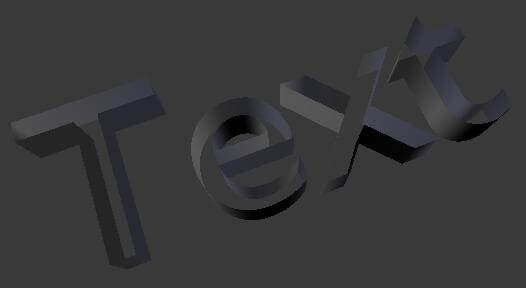
Boolean
Another type of effect we can create is boolean. This is when we make a text carve into another object. This is the example:
As you can see I used the block text from the example above to carve into a cube object. Another fairly simple but common effect.
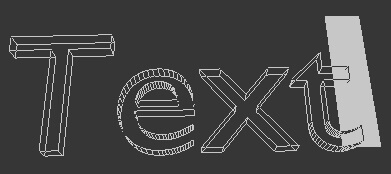
In this case we intersect the text with the cube. Then we add a boolean modifier set to difference to the cube object. In my base I used the bool tool add-on to automatically change the draw mode of the text to bounding box. This allow me to see the effect.
Find out more about add-ons here.
You can change the draw mode manually if you go to the object properties tab in the properties panel. That is the yellow icon. Go to viewport display and find «display as» and set it to bounds.
Next I added a bevel modifier to get some better lighting. I also had to check «harden normals» on the bevel modifier and activate auto smooth in the object data properties.
Follow curve
To have an object follow a curve we don’t need to convert the text to mesh.
Add text to a surface of another object
The last effect we will look at is how we can take a text and project it onto the surface of another object. Here is the example.
To create this effect, I created a flat text object and converted it to mesh. Then I used the «beautify faces» and «tris to quad» tools in edit mode to even out the geometry.
Next I positioned the text in front of the sphere so that It covered the area I wanted the text to be from an orthographic view.
Then I added a shrinkwrap modifier to the text and set the sphere as the target. Then I set the mode to «target normal project».
From here we add a solidify modifier and increase the depth of the text.
Note that the text is prone to getting skewed a bit when projected on a sphere. If you have a very long text to project such as in my case, the start and end will be visibly smaller when viewed from certain angles.
Another way to do this is to take a string of edges from the sphere and copy those to its own object and convert it to a curve. Then use that as a curve object for the text to follow. It is a bit more involved though.
Create your own font in Blender
We can create our own font in Blender, or at least kind of. The font we create won’t be usable in another application. There are other workflows to achieve that. But if we want to type out our own objects we can do that.
Create a text object and go to the text object properties panel. Find the font section and expand the transform subsection.
Here you will find a setting called «object font». Here you can type the name of your font. I will go with «font-«.
Create a new mesh object and call it «font-a».
Select your text object again, go to the object data properties and find the instancing section. Here, select verts and deselect display instancer.
Now enter edit mode and type «a». Note how your object is displayed instead of the letter «A». We can continue to create the whole alphabet.
If you keep the display instancer setting on, you will get both the letter from the font, and your object. This way we can create kind of an extension to the letters.
If the objects you create are too large, you can increase the spacing between letters. Go to the object data properties and find the paragraph section. In the spacing subsection you will find «character spacing». Increase it to space the objects further apart.
Final thoughts
By now you should have a solid understanding of how to use text objects in Blender. A key to mixing text and 3D is to have a good topology as we convert text to mesh. But understanding how the text object works and what different tools we have available as we move from text object to mesh object is also key.